How to Remove Grass to Start a Garden
This website is reader-supported - thank you! This post may contain affiliate links. As an Amazon Associate, I earn from qualifying purchases at no extra cost to you.
Starting a new garden can be an exciting and rewarding experience, but it can also be a daunting task.
One of the first steps in creating a new garden is preparing the soil, and this often involves removing any existing grass or weeds.
While it may seem like a daunting task, there are several methods for removing grass that are effective, environmentally friendly, and can even improve soil health.
Here we will explore different methods for removing grass, including manual removal, sod cutters, solarization, sheet mulching, raised garden beds, and chemical removal.
We'll discuss the pros and cons of each method, as well as tips and tricks to make the process as easy and efficient as possible.
Whether you're starting a new vegetable garden or creating a new flower bed, this guide will help you prepare your soil and get your garden off to a healthy start.
To learn what to do next after removing your grass, check out my guide:
Do I Need to Remove Grass Before Making a Garden?
It depends on the type of garden you want to create and the condition of the grass in your intended garden area.
If you want to create a traditional garden with flowers, vegetables, and other plants, it's generally recommended that you remove the grass first.
Grass can compete with your garden plants for water, nutrients, and sunlight, and it can be difficult to get your plants to grow in grassy soil.
There are several ways to remove grass from an area where you want to create a garden.
You can use a spade or shovel to cut and remove the sod, or you can use a sod cutter, which is a machine that slices through the grass and roots, allowing you to remove it in sections.
If you want to create a garden with grassy areas, such as a lawn or wildflower meadow garden, you can leave the grass in place and work around it.
In this case, you may need to add soil and nutrients to create a good growing environment for your grass and other plants.
In any case, it's a good idea to test the soil to determine its pH and nutrient levels before starting your garden.
This will help you determine what amendments, if any, you need to add to create the best growing conditions for your plants.
Here is the soil pH tester I recommend using:

What is the Easiest Way to Remove Grass?
The easiest way to remove grass depends on the size of the area you need to clear and the tools and equipment you have available.
Here are the best methods to consider:
Manual Removal
This method requires some manual labor but is effective for small areas or around edges of a lawn.
Use a shovel to dig up the grass and its roots, making sure to remove all the grass clumps and dead grass.
Dispose of the grass clumps by composting or placing in yard waste.
Manual removal can be time-consuming and labor-intensive, but it's a good option for small areas or when you don't have access to specialized equipment like a sod cutter.
Be sure to take breaks while working, and consider enlisting help from friends or family to make the process go faster.
Here are the steps to manually remove grass for a garden:
Mark the area:
Use stakes and string or a garden hose to mark the area you want to remove.
This will help you stay focused and ensure you remove the grass from the right spot.
Mow the grass:
Use a lawnmower to cut the grass as short as possible.
This will make it easier to remove the grass and roots.
Water the area:
Water the area thoroughly to make the soil moist and easier to work with.
Cut the grass into sections:
Use a spade or shovel to cut the grass into small sections, about 1 to 2 feet square.
Here is the spade I recommend using:

Lift the grass sections:
Lift the grass sections out of the ground, using the spade or shovel to loosen the roots.
Shake off any excess soil and transfer the sections to a compost pile or other area for disposal.
Repeat the process:
Continue cutting and lifting the grass sections until you have removed all of the grass from the area.
Prepare the soil:
Once the grass has been removed, you may need to prepare the soil by adding compost, fertilizer, or other amendments to improve the soil quality for planting.
Cons:
Labor-intensive and time-consuming
Difficult to remove all the roots and rhizomes of the grass, which can regrow and cause problems later
Not suitable for large areas or heavy infestations
Pros:
No special tools or equipment required
Can be done on any size of lawn or garden
Inexpensive and doesn't require any chemicals or herbicides
For more garden inspiration, check out my guides:
Water Butts: Sustainable Water Storage for Your Garden
Does Potting Soil Go Bad? Know the Warning Signs
Plants That Deter Cats: A Natural Solution to Keep Cats at Bay
Sod Cutter
A sod cutter is a grass removal tool that can quickly remove grass from a large area.
This method is great if you want to start a vegetable garden or large flower bed.
It can be labor-intensive, but it is a quick method to get rid of grass, especially if you have Bermuda grass.
Here are the steps to follow when using a sod cutter:
Mark the area:
Use stakes and string or a garden hose to mark the area you want to remove.
This will help you stay focused and ensure you remove the grass from the right spot.
Adjust the blade depth:
Adjust the blade depth on the sod cutter to the desired depth, usually 1-2 inches.
Here is the sod cutter I recommend:

Cut the sod:
Slowly push the sod cutter forward, cutting through the grass and roots.
As you cut, roll the sod up into sections and place them to the side for disposal.
Repeat the process:
Continue cutting and rolling up the sod sections until you have removed all of the grass from the area.
Clean up:
Rake up any remaining debris and dispose of the grass sections and other waste.
Prepare the soil:
Once the grass has been removed, you may need to prepare the soil by adding compost, fertilizer, or other amendments to improve the soil quality for planting.
Be sure to follow all safety guidelines and operating instructions, and consider enlisting help from friends or family to make the process go faster.
Cons:
Requires specialized equipment
Can cause soil compaction and damage to the soil structure
Pros:
Can quickly remove large areas of grass and weeds
Roots and rhizomes are cut cleanly, which can prevent regrowth
Can be rented from equipment rental stores
For more inspiration, check out my guides:
Solarization
Solarization is a process of using clear plastic to trap heat and moisture, killing the grass and other weeds in the area.
Solarization can be an effective way to remove grass and other weeds from an area without using chemicals or specialized equipment.
It does, however, require a lot of time and patience, as well as a long period of hot, sunny weather.
It's best to attempt this method during the hottest part of the year in your region.
Here are the steps to follow:
Mark the area:
Use stakes and string or a garden hose to mark the area you want to remove.
This will help you stay focused and ensure you remove the grass from the right spot.
Mow the grass:
Use a lawnmower to cut the grass as short as possible.
This will make it easier to remove the grass and roots.
Water the area:
Water the area thoroughly to make the soil moist and easier to work with.
Cover the area with plastic:
Cover the area with clear plastic sheeting, making sure it is tightly sealed around the edges.
Use rocks or soil to hold down the edges of the plastic and keep it in place.
Here is the plastic sheeting I recommend:

Wait:
Leave the plastic in place for 4-6 weeks during the hottest part of the year.
The heat and moisture trapped under the plastic will kill the grass and other weeds in the area.
Remove the plastic:
After 4-6 weeks, remove the plastic and dispose of it properly.
Rake up any remaining debris:
Rake up any remaining grass or debris, and dispose of it properly.
Prepare the soil:
Once the grass has been removed, you may need to prepare the soil by adding compost, fertilizer, or other amendments to improve the soil quality for planting.
Cons:
Requires several weeks of warm, sunny weather to be effective
Only works in areas with high levels of sunlight
Can damage beneficial soil microorganisms
Pros:
Effective at killing grass and other weeds without chemicals
Uses natural sunlight and heat to kill weeds
Can be done without disturbing the soil
For more garden tips, check out my guide:
Sheet Mulching
One method of grass removal is to smother it using a layer of organic material such as compost or mulch.
This method is ideal for small garden areas or flower beds.
Simply cover the grass with a layer of organic matter at least 2-3 inches thick, and the grass will eventually die and decompose.
This technique works well for killing weeds too.
However, it can take several months to completely kill off the grass, so plan ahead.
Sheet mulching is a natural and effective way to build healthy soil and prepare an area for planting.
It involves layering organic materials on top of the soil to smother weeds, improve soil structure and fertility, and conserve soil moisture.
The term "sheet" refers to the large surface area that is covered by the layering process.
Here are the steps to follow for sheet mulching:
Mark the area:
Use stakes and string or a garden hose to mark the area you want to remove.
This will help you stay focused and ensure you remove the grass from the right spot.
Mow the grass:
Use a lawnmower to cut the grass as short as possible.
This will make it easier to remove the grass and roots.
Water the area:
Water the area thoroughly to make the soil moist and easier to work with.
Add a layer of cardboard:
Lay a layer of cardboard over the area, making sure to overlap the edges to prevent grass from growing through the gaps.
You can use flattened cardboard boxes or thick layers of newspaper.
Make sure to wet the cardboard thoroughly to keep it in place.
Add a layer of compost:
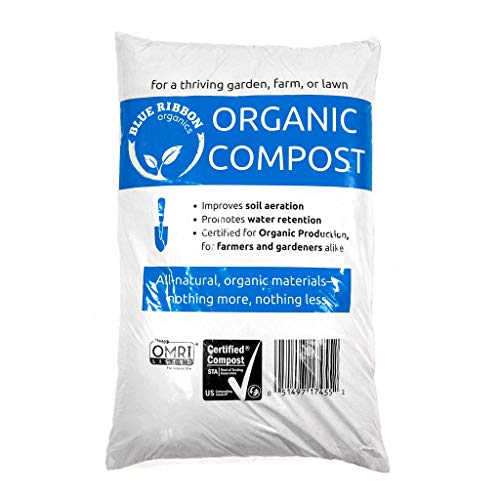
Add a layer of compost on top of the cardboard, about 2-4 inches thick.
This will help feed the soil and provide nutrients for future plants.
Here is the compost I like to use:
Add a layer of mulch:
Add a layer of organic mulch on top of the compost, about 3-4 inches thick.
This will help retain moisture, suppress weeds, and add organic matter to the soil.
Here is the mulch I like to use:

Wait:
Wait for several months, ideally 3-6 months, for the grass and weeds to decompose under the layers of cardboard, compost, and mulch.
Plant:
After several months, you can plant directly into the sheet mulch by cutting holes through the layers and planting your desired plants.
Sheet mulching is a great way to remove grass and prepare the soil for planting without using chemicals or specialized equipment.
It also helps to build healthy soil by adding organic matter and promoting soil microorganisms.
Check out my full guide: The Best Alternatives to Traditional Mulch for Your Garden.
Cons:
Takes several months to be effective
Requires a large amount of organic matter
Can be difficult to plant directly into the sheet mulch without additional preparation
Pros:
Builds healthy soil by adding organic matter
Suppresses weeds without chemicals
Can be done without disturbing the soil
Raised Beds
Creating garden beds can be a great way to grow vegetables, herbs, and flowers.
However, preparing the garden soil can be labor intensive, especially if you're starting with an area covered in grass.
To smother grass and weed seeds, many gardeners opt to build raised beds and fill them with fresh soil.
This can also help improve drainage and make it easier to control the quality of the soil.
While it may require some initial effort to build the raised beds and fill them with soil, this method can save time and energy in the long run.
Here is the raised garden bed I recommend:

Should I Remove Grass for Raised Bed?
Removing grass for a raised bed is generally a good idea, as it can help prevent grass from growing up through your soil and competing with your plants for nutrients and water.
Additionally, the grass roots may eventually grow into your raised bed and create problems.
To remove the grass, you can use a spade or shovel to cut around the perimeter of the bed and lift out the turf.
Alternatively, you can use a sod cutter or rent a machine to remove the grass more quickly and efficiently.
If you don't want to remove the grass entirely, you can also try smothering it by laying down a layer of cardboard or newspaper over the area and then covering it with soil or mulch.
Over time, the grass should die off and decompose, leaving behind a clear area for your raised bed.
Cons:
Creating raised beds can be more expensive than simply removing grass manually or with a sod cutter.
Building raised beds requires time and effort to construct, fill with soil, and maintain.
Raised beds are contained, which means they can only accommodate a certain amount of plants, which may be limiting for some gardeners.
Raised beds may require more frequent watering, as the soil can dry out more quickly than ground-level soil.
Pros:
Raised beds allow you to work with fresh soil that is free of grass and weeds, which can improve the quality of the soil and the growth of your plants.
By building the beds above ground level, you can effectively smother the grass and prevent it from growing back.
Raised beds offer better drainage, which can prevent waterlogging and promote healthy plant growth.
Raised beds can warm up more quickly in the spring, which can extend the growing season.
Raised beds are contained, which makes it easier to monitor and control any potential pest or disease issues that may arise.
Equip your urban green space with my recommend top tier tools.

What is the Best Way to Get Rid of Grass in a Flower Bed?
The best way to get rid of grass in a flower garden bed depends on the size of the area, the amount of grass.
Here are the best methods to consider in order to kill grass in an existing flower bed.
Manual removal:
If the area is relatively small and the grass is not too thick, you can remove it by hand.
Use a garden spade or a shovel to dig out the grass, being sure to remove as much of the root system as possible.
Sheet mulching:
This method involves layering organic materials, such as cardboard, newspapers, and mulch, over the grass.
Over time, the materials will decompose and smother the grass, making it easier to remove.
This method is best for areas with light to moderate grass growth.
How to Prepare Soil After You Remove Grass
After removing the grass, it's important to take the following steps to prepare the soil for planting.
By taking these steps to prepare the soil, you can help ensure that your plants have the best possible growing conditions and a healthy start.
Amend the soil:
Grass removal can disturb the soil structure, so it's a good idea to amend the soil with organic matter, such as compost or aged manure.
This will help improve soil fertility, water retention, and drainage.
Test the soil:
Use a soil tester to determine the pH level and nutrient content of your soil.
This information will help you determine what additional amendments, such as lime or sulfur, may be needed.
Here is the soil tester I recommend:
Remove any remaining roots or debris:
After removing the grass, be sure to remove any remaining roots, rocks, or other debris from the soil.
This will help prevent obstacles and ensure good seed-to-soil contact.
Add mulch:
Applying a layer of mulch to the soil surface can help retain moisture and suppress weed growth.
Choose a type of mulch that is appropriate for your plants and the climate in your area.
Here is the one I recommend:
Consider cover cropping:
Planting a cover crop, such as clover or winter rye, can help improve soil health by adding organic matter, fixing nitrogen, and preventing erosion.
Cover crops can be tilled into the soil before planting your desired plants.
Removing grass from your garden can be a crucial step towards creating a healthy and productive growing space.
While there are several methods to choose from, each with its own advantages and disadvantages, it's important to consider the long-term impact on the environment and soil health.
Manual removal, sod cutters, solarization, and sheet mulching all have their place in the gardening world, but it's up to you to decide which method works best for your specific needs and goals.
Remember to take your time, be patient, and focus on building healthy soil for your new garden.
By following these tips and methods, you'll be well on your way to creating a thriving garden full of beautiful plants and delicious vegetables.


