How to Grow Geranium Cuttings
This website is reader-supported - thank you! This post may contain affiliate links. As an Amazon Associate, I earn from qualifying purchases at no extra cost to you.
I love working with geranium cuttings, and over time, I've picked up some tips that have really improved my results when propagating geraniums.
In this post, I’ll share my process for taking cuttings from a healthy geranium plant and turning them into thriving new roots and leaves.
Whether you’re working with a single geranium plant or an entire garden of them, these methods have helped me boost my success rate without a lot of fuss.
For more propagation tips, check out my guides:
Propagating Sage: A Simple Guide

Materials and Preparation
Before I get started with any geranium cutting project, I always take a moment to gather everything I need.
This step might seem simple, but having all your supplies at your fingertips makes the process much smoother.
Here’s a look at what I rely on:
Clean Cutting Tools:
I always start with a clean, sharp pair of scissors or pruning shears.
Having a tool that’s ready to work is key for making precise cuts on the geranium stem.
A quick clean before use also helps keep any unwanted bacteria away from the healthy plant tissue.
These pruning shears are perfect for the job:

Rooting Products:
I usually keep rooting hormone and rooting powder on hand.
I find that these products really boost the chances of new roots forming on my cuttings, setting them up for success.
Here is the rooting powder I recommend:

Potting Soil and Containers:
My next stop is always the container and potting soil.
I prefer using a well-draining mix along with containers that have drainage holes.
This setup is important for preventing problems like root rot and ensures that the cutting isn’t left sitting in too much water.
It’s something that really sets the stage for healthy new growth.
These containers are great:

Water Supply:
If I decide to propagate my geranium cuttings in water, I make sure to have a clean, clear container ready.
I really love watching the progress as new roots emerge, and a transparent container lets me keep a close eye on everything happening below the surface.
For more propagations tips, check out my guides:

Mother plants used for taking cuttings.
Step-by-Step: Taking and Preparing Geranium Cuttings
Over time, I’ve developed a routine that helps me feel confident every time I work with my geranium cuttings.
Here’s how I do it:
Selecting the Cutting:
I start by scanning my mother plant for a stem that looks healthy and full of promise.
I prefer a cutting that's around 4–6 inches long, with at least one well-defined node.
That node is my little signal that new roots are likely to form.
Preparing the Cutting:
Once I’ve chosen the perfect stem, I move on to preparing it.
First, I make sure my scissors or pruning shears are spotless and sharp—this helps me make a clean cut without stressing the plant.
I then carefully remove the lower leaves, leaving one or two at the top so that the node is fully exposed.
This little bit of extra care sets the stage for healthy root growth.
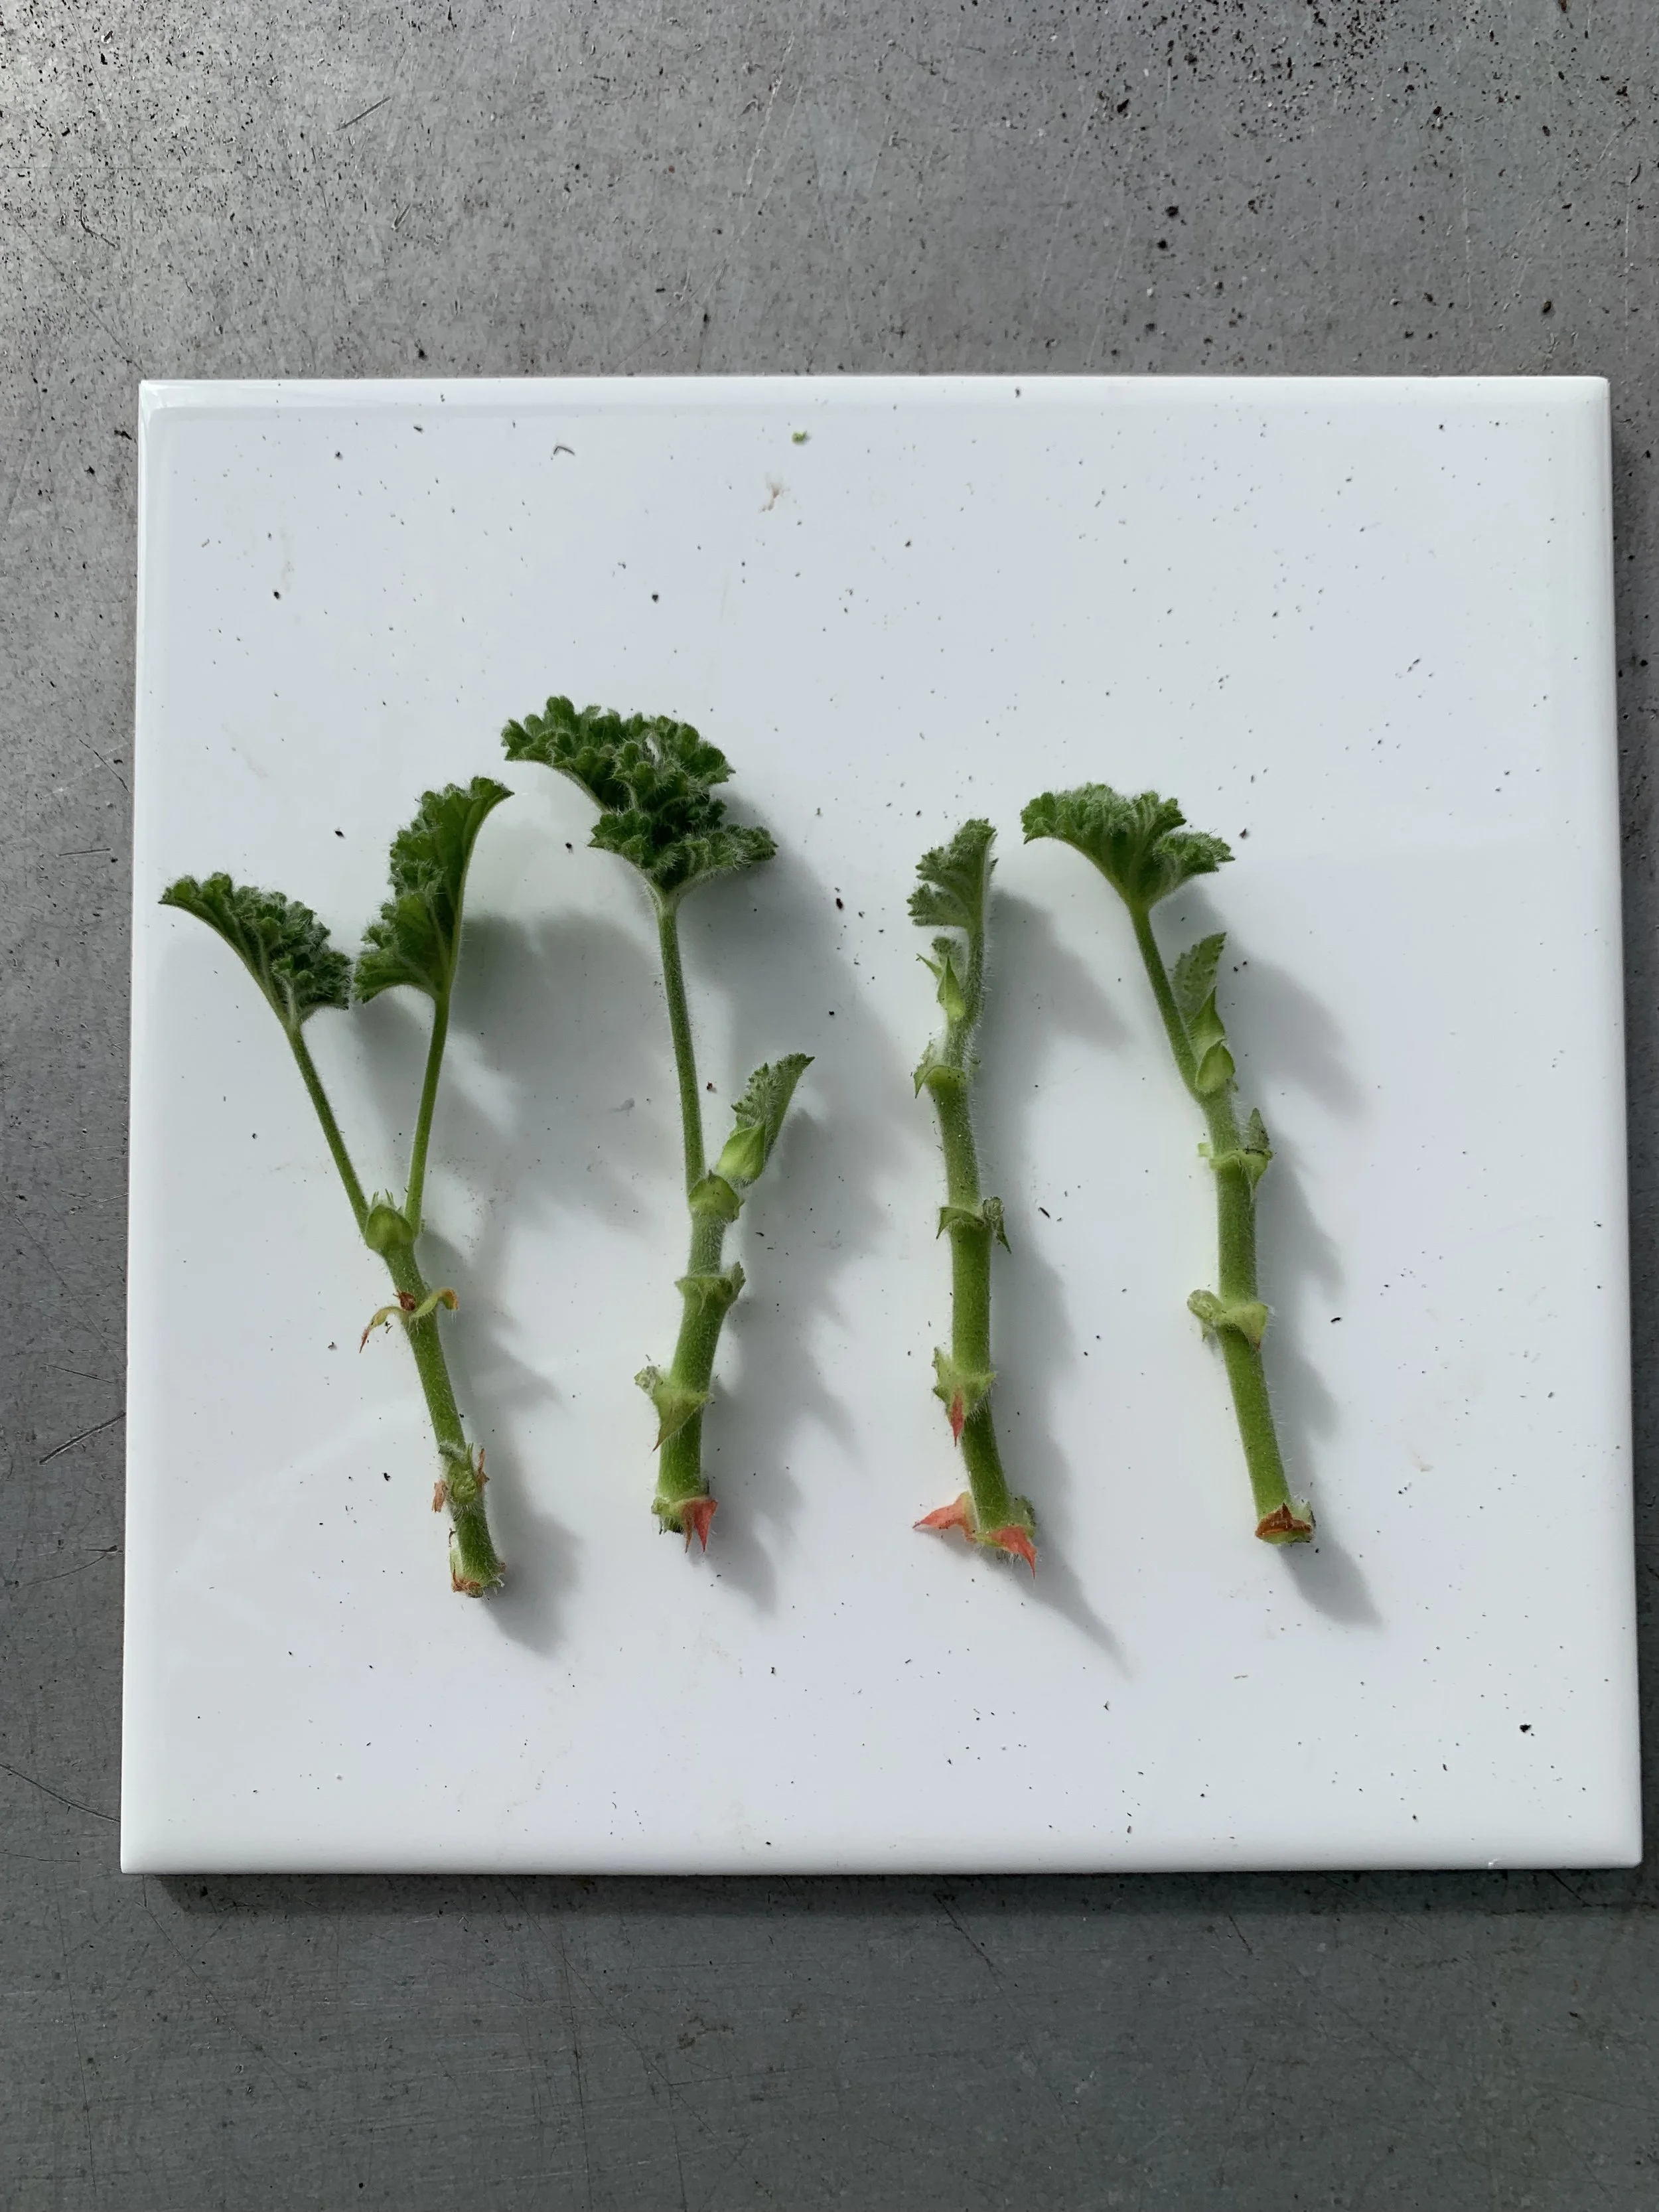
Prepared geranium cuttings.
Choosing the Rooting Method:
At this point, I decide whether to let nature work its course in water or to plant the cutting directly into soil.
Rooting in water:
I gently place the cutting in a clear jar filled with water, ensuring that the node is submerged.
Planting directly in soil:
I dip the cut end into rooting hormone or rooting powder before nestling it into moist, well-draining potting soil.
I then place the container in a spot with plenty of indirect light.
This method has worked wonderfully for me, especially when I’m planning to nurture my cuttings indoors until they’re strong enough to transition to a garden setup.
For more propagation ideas, check out my guides:
Methods of Propagation: Water vs. Soil
I've found that choosing between water and soil propagation really comes down to the situation at hand.
Each method has its own advantages.
Propagating in Water
When I decide to propagate my geranium cuttings in water, it's like having a front-row seat to nature’s performance.
I place my freshly prepared cutting in a clear container filled with water, making sure that the node is submerged just enough to encourage new roots.
One of the things I love about this method is the immediate visual feedback—I can watch as tiny new roots begin to emerge, growing day by day.
I find that using water allows me to adjust things easily; if I notice the water isn’t as clean as it should be, I simply change it, ensuring a healthy environment for my cutting.
Propagating in Soil
On the other hand, there are times when I prefer the simplicity of planting the cutting directly into potting soil.
For this method, I dip the cut end in rooting hormone or rooting powder before gently placing it into a container filled with a well-draining mix.
I choose a spot with indirect light, and from there, it's mostly a waiting game.
While I can't see the roots forming right away like I do in water, I know that the soil will nurture the cutting at its own pace.
This method feels more like setting a gentle, steady course for the cutting to grow, which can be especially comforting during the cooler winter months or when I want to keep things a bit more low-key.
I make sure the soil remains evenly moist without being waterlogged, which helps prevent any issues like root rot.
Learn more about growing from cuttings with my guides:
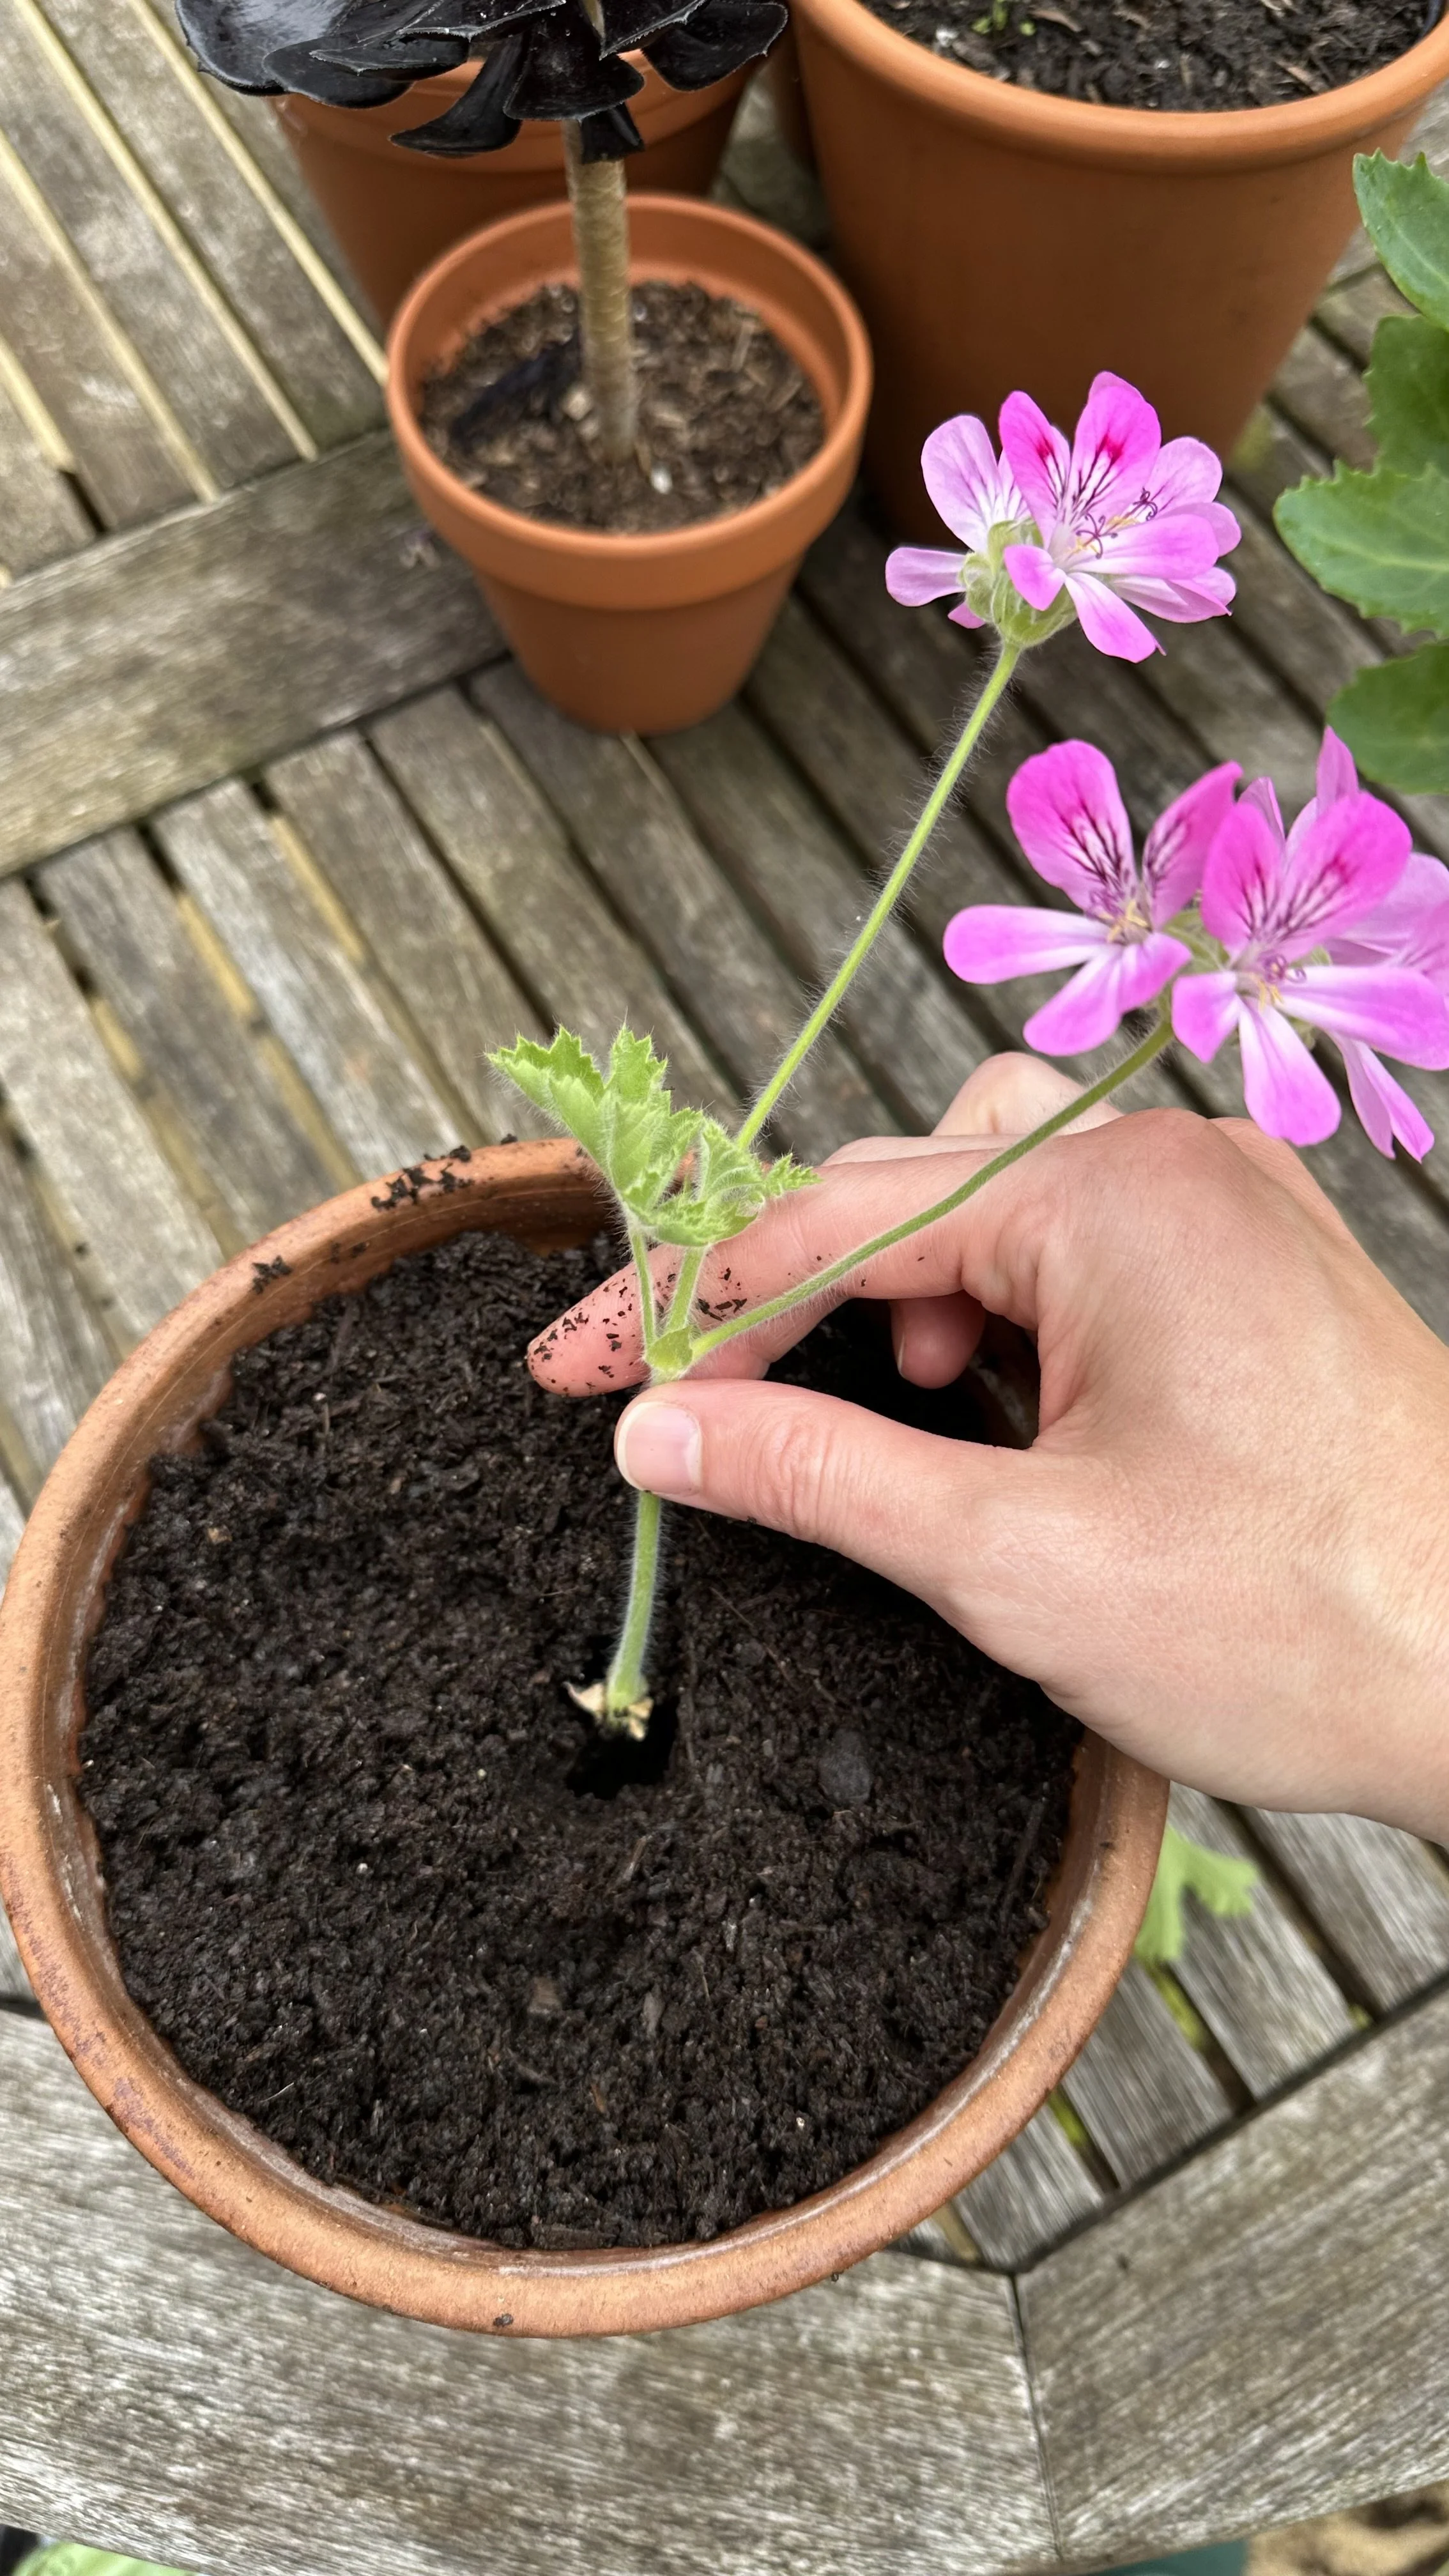
Note: I removed the flower before planting the cutting in the soil :)
Caring for Your New Geranium Cuttings
After placing your geranium cutting in water or soil, the real nurturing begins.
Here’s how I look after my new geranium cuttings, making sure they have the best chance to grow strong and healthy:
Consistent Watering
I’ve learned that the right watering routine is key.
With my cuttings in water, I make sure to keep the water fresh by changing it every few days.
If the cutting is in soil, I water gently to keep the soil consistently moist without overdoing it—excess moisture can lead to root rot, something I always want to avoid.
I find that checking the soil's moisture level every day helps me stay on track, especially when the weather is a bit unpredictable.
The Right Light and Temperature
I place my cuttings where they get plenty of indirect sunlight.
Direct sunlight can be too harsh for a young cutting, so a bright, indirect spot works best.
I also pay close attention to the temperature around the cutting.
A warm, stable environment encourages the cutting to develop new roots and leaves.
For those chilly winter months, I make sure the cutting is in a room where the temperature remains steady, reducing stress on the plant.
Regular Monitoring and Gentle Care
Part of caring for my new geranium cuttings involves frequent check-ins.
I take a few moments each day to look for signs of new roots and fresh leaf growth.
This regular observation not only reassures me that the cutting is on the right track, but it also gives me a chance to catch any issues early.
If I notice anything unusual, like a wilting stem or a change in color, I can adjust my care routine accordingly—perhaps tweaking the watering schedule or moving the cutting to a slightly different spot.
For more propagation tips and guides, check out:
The Ultimate Guide to Choosing the Best Electric Propagators
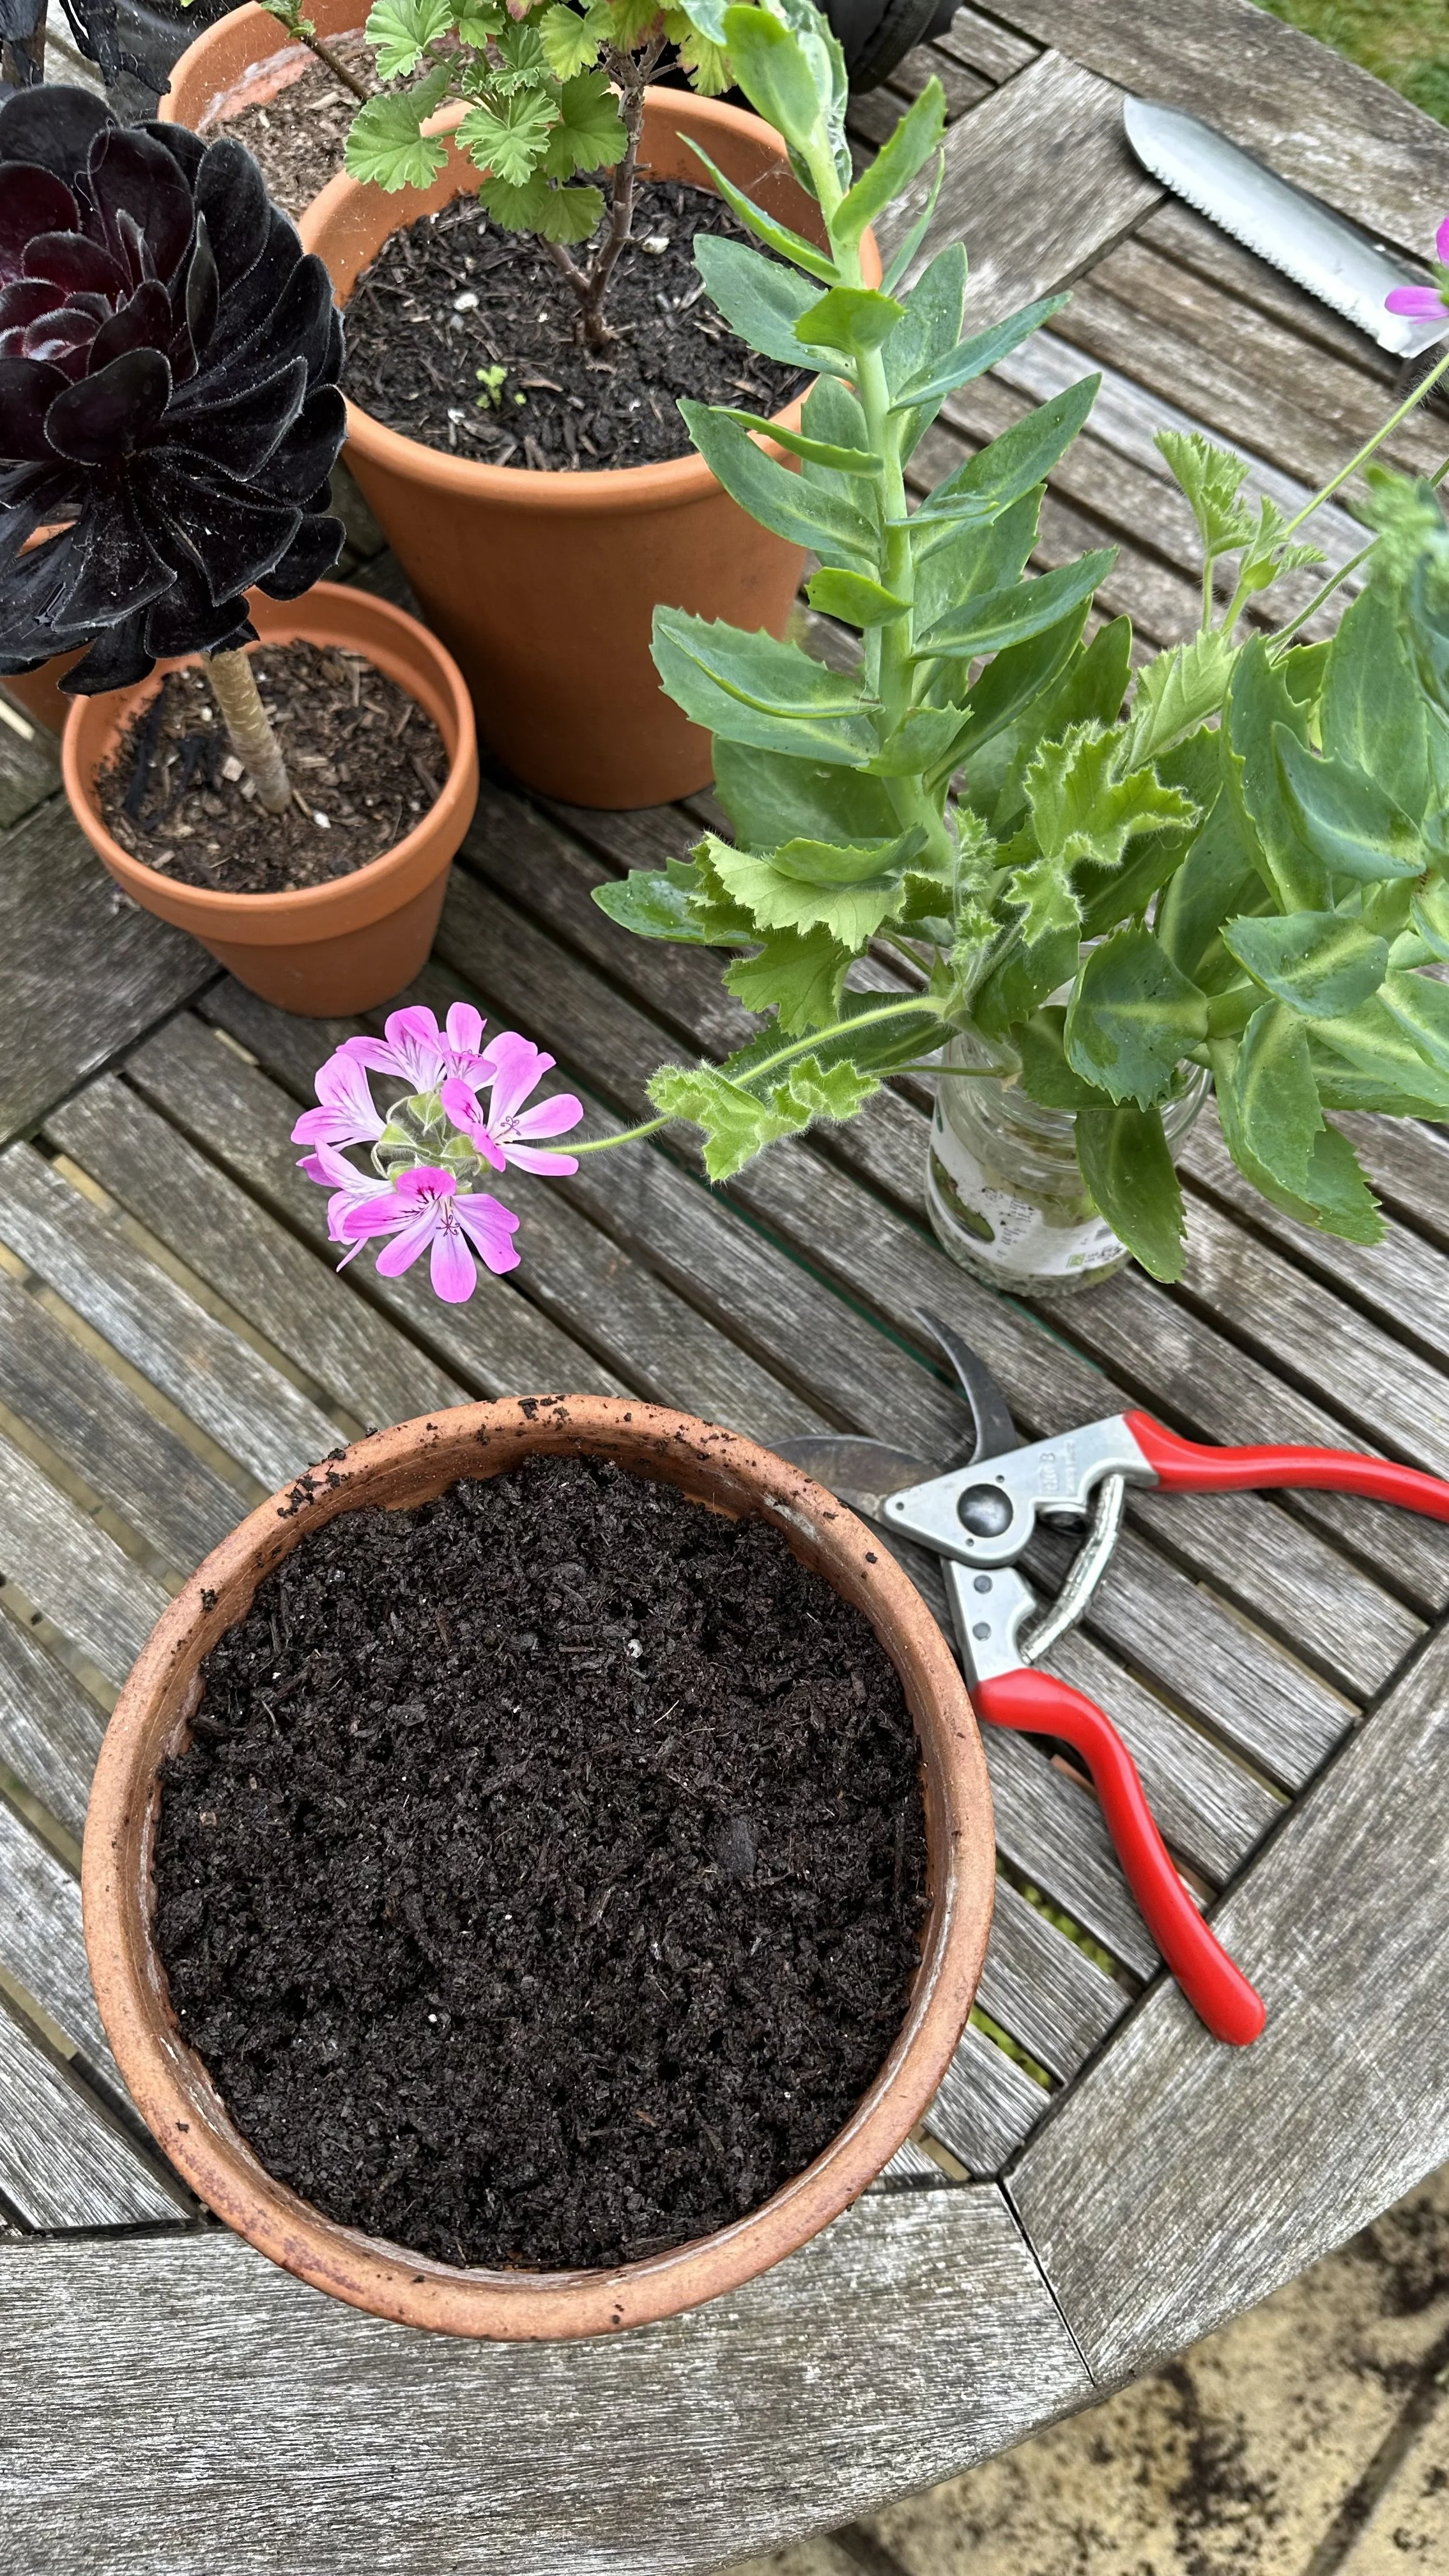
Workbench and a jar full of cutting material ready to be prepared.
Tips for Success
Over the years, I’ve gathered a few little tricks that have really helped boost my confidence and my success rate when propagating geranium cuttings.
Here are some tips that I always keep in mind:
Select the Best Cutting:
I always start by choosing a healthy stem from a well-cared-for geranium plant.
A cutting with firm leaves and a bit of new growth usually sets the stage for robust new roots.
Trust me, taking cuttings from a healthy mother plant makes all the difference.
Prep with Care:
Before planting or placing your cutting in water, I make sure to remove any lower leaves gently.
This helps the cutting focus its energy on developing new roots rather than supporting extra foliage.
I also like to use a little rooting hormone or rooting powder—this extra step has consistently improved the chances of my geranium cutting getting off to a strong start.
Mind Your Moisture:
Whether you’re rooting in water or planting directly in potting soil, maintaining the right moisture level is key.
If I’m rooting in water, I change it regularly to keep it clean and oxygen-rich.
When using soil, I ensure it’s moist but not soggy, as too much water can lead to root rot.
Using a container with drainage holes helps a lot.
Be Patient and Observant:
One of the most important things I’ve learned is that every cutting grows at its own pace.
I set aside a little time each day to check on the progress.
Watching those tiny new roots and leaves form is incredibly rewarding, and it reminds me that patience truly pays off.
Adapt to the Season:
I adjust my methods based on the season.
During the cooler winter months, I make sure my cuttings are kept in a warmer, sheltered spot.
This extra attention to temperature helps stimulate root growth and ensures that the cuttings continue to thrive, even when the outdoor conditions aren’t ideal.
For more planting tips, check out my guides:
Wrap-Up
I hope this guide has provided you with some useful insights to help you start geraniums at home with confidence.
There's something truly fulfilling about watching a small piece of a plant transform into thriving geranium plants.
Every time I root geranium cuttings, I'm reminded of the simple pleasures that come from nurturing these plants.
With a little care and patience, you'll see your cuttings flourish into a beautiful display and a lovely flower that brightens your space.
Faqs
Below are some questions I often encounter that haven’t been covered in detail above.
Can I take geranium cuttings in September or during autumn?
Yes, you can take geranium cuttings in September.
However, as the days shorten and temperatures drop, the rooting process might slow down a bit.
If you decide to take cuttings in autumn, consider providing extra warmth indoors to support steady root growth.
Do I really need to use rooting hormone or rooting powder for my cuttings?
While many gardeners use rooting hormone or rooting powder to give their cuttings an extra boost, it isn’t absolutely required.
Some gardeners have successfully propagated geraniums without these products, especially if the cutting comes from a particularly healthy geranium plant.
It really depends on your own experience and the condition of your cutting.
How do geranium cuttings propagated indoors perform compared to those grown outdoors?
Indoor propagation offers a controlled environment that can lead to steady root development.
Once the cutting establishes itself, transitioning it to outdoor conditions can result in a robust geranium plant.
The key is to gradually adjust the cutting to outdoor light and temperature to avoid shock.
What are some signs that my geranium cutting is healthy and ready for further care?
A healthy geranium cutting will show firm, unblemished stem tissue along with a few fresh leaves.
Look for the emergence of new roots or subtle leaf expansion as indicators of vitality.
If the cutting appears limp or discolored, it may need adjustments in watering or temperature management.
Is it possible to propagate geraniums from leaf cuttings, and how does that process differ?
Yes, propagating geraniums from leaf cuttings is an option.
This method involves placing a single leaf—sometimes with a small portion of the stem—on top of or partially buried in well-draining potting soil.
Over time, you may notice the development of new roots and eventually a small shoot emerging from the leaf.
It’s a slightly different approach compared to using a stem cutting, offering another way to propagate geraniums in your garden.
Feel free to reach out with any additional questions or share your own experiences with growing geranium cuttings. Happy gardening!
Pin this post to save it for later!