No Dig Gardening Method: Grow More with Less Effort
This website is reader-supported - thank you! This post may contain affiliate links. As an Amazon Associate, I earn from qualifying purchases at no extra cost to you.
I used to think gardening meant hours of digging, turning over soil, and battling weeds—until I discovered the no dig gardening method.
It is a total game changer.
If you’ve been thinking about ways to improve your garden beds without all the heavy lifting, the no dig method might be just what you need.
Here I will walk you through how to get started and the benefits you can expect to see over time.
For more inspiration, check out my guides:
Key Principles of No Dig Gardening
The core idea behind no dig gardening is to treat the soil as a living ecosystem.
By minimizing disturbance to the soil, we help maintain its natural structure and the complex web of life within it.
This method encourages healthier plants, fewer weeds, and better moisture retention, all while saving you time and effort.
Preserve Soil Structure
Traditional gardening often involves digging or tilling the soil to loosen it up for planting.
While this might seem beneficial, it actually disrupts the natural layers of soil and the organisms that live within it.
In a healthy garden, soil has layers that allow for water infiltration, air circulation, and root development.
When you dig, you break up these layers and expose beneficial microbes and earthworms to harmful conditions like sunlight and air, which can kill them or force them to move deeper into the ground.
By leaving the soil undisturbed, you’re preserving its natural structure, which allows it to function at its best.
Healthy, structured soil is better at retaining water, preventing erosion, and supporting plant roots.
Layer Organic Matter on the Surface
Instead of digging compost or fertilizers into the soil, the no dig method focuses on adding organic matter like compost, manure, leaf mulch, or even grass clippings directly onto the soil’s surface.
This process mimics what happens in nature—think of a forest floor where leaves and plant debris decompose over time, enriching the soil from above.
These layers act like a slow-release fertilizer, gradually breaking down and being incorporated into the soil by natural processes.
Not only does this feed the plants, but it also feeds the microorganisms and earthworms living beneath the surface, which, in turn, help improve soil structure and nutrient availability.
Weed Suppression
One of the major benefits I’ve experienced with the no dig gardening method is the natural suppression of weeds.
By layering materials like cardboard, newspaper, or thick layers of compost, you block light from reaching the soil, which prevents weed seeds from germinating.
The more layers you add, the more difficult it becomes for weeds to push through.
As a result, you’ll spend less time weeding your garden.
The key is to keep adding layers of organic matter each year.
Over time, this creates a rich, weed-free growing environment.
Encouraging Soil Life
The soil is teeming with life—earthworms, fungi, bacteria, and other microorganisms.
These organisms play a crucial role in breaking down organic matter and converting it into nutrients that plants can absorb.
When you dig or till the soil, you disrupt this delicate ecosystem, reducing the soil’s ability to support plant life.
The no dig method encourages a thriving underground ecosystem by providing food (organic matter) and a stable environment where these organisms can thrive.
Earthworms, for example, are nature’s tillers.
They create channels in the soil that allow air and water to penetrate, improving soil structure without any human intervention.
Building Fertility Over Time
One of the most important aspects of the no dig method is that it improves soil fertility gradually and sustainably.
By continually adding organic material to the soil surface, you build fertility without relying on synthetic fertilizers or constant digging.
As the compost and mulch break down, they enrich the soil with essential nutrients, improving its ability to support plant growth.
This process can take a little time to show results, but each year, the soil becomes more nutrient-rich, requiring less and less input from you.
The more consistent you are with adding organic layers, the healthier your plants will become over the seasons.
Moisture Retention
The layers of mulch and compost not only suppress weeds and improve fertility but also help retain moisture in the soil.
Since the soil is not exposed to the elements, there’s less evaporation, which means the soil stays moist for longer periods.
This is especially useful in hot and dry climates where water conservation is important.
Mulching with straw, leaves, or compost creates a protective barrier that keeps the soil cool, reduces water loss, and prevents plants from drying out.
Compatibility with Different Soil Types
One thing that stood out to me when I first started with the no dig method is how it works on almost any type of soil, even tough clay soil.
Instead of trying to break up the heavy, compacted soil, the layers of compost and organic matter will, over time, help improve its texture.
The organic material improves drainage and introduces air pockets into the soil, making it easier for roots to grow.
Though it takes time to see improvements in tougher soils, consistent layering will eventually transform even the most difficult soils into productive garden beds.
To learn more about the no dig gardening method, I recommend this book by Charles Dowding, the guru of the no dig method:

How to Start a No Dig Garden
Starting a no dig garden is incredibly straightforward, but it does require a bit of planning and the right materials.
The beauty of this method is that it works for both small gardens and large spaces, and it can be started directly on existing grass, compacted soil, or even an old garden bed.
Here's a step-by-step guide on how to set up a no dig garden bed:
1. Choose Your Location
The first step in starting any garden is deciding where to put it.
When starting a no dig garden, focus on a few key factors:
Sunlight:
Most plants, especially vegetables, need at least 6-8 hours of sunlight each day.
Make sure your garden bed is in a spot that gets plenty of direct sun.
Drainage:
Even though the no dig method helps improve soil structure, it’s still important to choose a location where water won’t pool.
Well-draining soil is ideal, but you can work with heavy soils like clay by adding extra layers of organic matter.
Size:
Start small, especially if it’s your first time using this method.
A bed that is about 4x8 feet is enough space to experiment without being overwhelming.
It’s always easier to expand later once you get the hang of things.
2. Prepare the Ground (No Digging Required!)
Here’s where the magic of the no dig method comes in: you don’t need to dig or turn the soil.
Whether your starting ground is covered in weeds, grass, or bare soil, the preparation process is essentially the same.
Grass and Weeds:
If your chosen spot has grass or weeds, don’t worry about removing them.
You can leave the grass and weeds in place when you set up your first bed because they’ll decompose underneath the layers you’ll add on top.
However, if you have very aggressive weeds like bindweed or couch grass, it might be helpful to cut them down first or smother them with additional layers.
3. Lay Down Cardboard or Newspaper
To smother the grass and prevent weed seeds from sprouting, use cardboard as your base layer.
This is one of the key steps in the no dig process, as it blocks light and keeps the weeds from growing through your garden bed.
Cardboard:
Use plain cardboard boxes (avoid any glossy or wax-coated cardboard, as these don’t break down as easily).
Lay the cardboard flat, overlapping the edges by a few inches to make sure there are no gaps where weeds could sneak through.
Soak the cardboard with water after laying it down, which helps it start breaking down and encourages worms to move in.
Newspaper:
If you don’t have cardboard, thick layers of newspaper can work too.
You can use newspaper in a pinch by laying 6-10 sheets thick.
Again, overlapping is key, and you’ll want to soak the newspaper to help it decompose.
4. Add Layers of Organic Matter
Here’s where the soil-building magic happens.
On top of the cardboard or newspaper, you’ll add layers of organic matter like compost, well-rotted manure, leaf mulch, or grass clippings.
The idea is to create a rich growing medium that your plants can thrive in while feeding the soil life underneath.
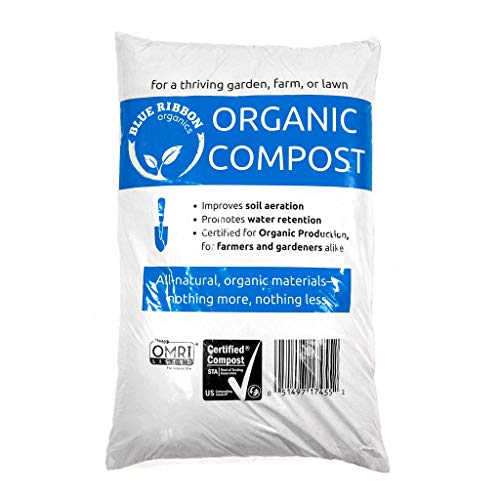
Compost:
Add about 3-4 inches of compost on top of the cardboard.
If you have well-rotted manure or homemade compost, use that.
If not, bagged compost from a garden center works just as well.
This layer serves as the growing medium for your plants, so the richer it is, the better.
Here is the compost I recommend:
Mulch:
After the compost, add a layer of mulch to help retain moisture and further suppress weeds.
You can use straw, wood chips, or leaves.
Straw is great because it’s lightweight, breaks down slowly, and is easy to manage.
Spread about 2-3 inches of mulch on top of the compost to complete your layers.
If you have extra organic materials like grass clippings, kitchen scraps (no meat or dairy), or aged manure, you can add those between the compost and mulch layers to further enrich the soil.
These layers will break down over time and improve soil fertility.
Here is the straw I recommend:

5. Plant Directly into the Compost
Once the layers are in place, the garden bed is ready for planting.
This was my favorite part because there’s no need to wait for the layers to break down before planting.
Simply dig small holes into the compost layer and plant your seeds or seedlings right away.
Spacing:
The compost layer is perfect for growing shallow-rooted plants like leafy greens, herbs, and flowers.
If you’re growing deeper-rooted vegetables like tomatoes, potatoes, or carrots, make sure your compost layer is thick enough (at least 4 inches) to support them.
Watering:
After planting, give the bed a good watering to help settle the layers and encourage root growth.
Once the initial layers are in place, the no dig garden retains moisture really well, meaning you don’t need to water as often as a traditional garden bed.
6. Maintain the Garden Over Time
Maintaining a no dig garden is simple, but you’ll want to keep an eye on a few things as the layers break down and your plants grow:
Add More Compost and Mulch Annually:
Each year, refresh your no dig beds by adding another layer of compost and mulch to the surface.
This keeps the soil healthy and adds nutrients for the next growing season.
It’s best to do this at the end of the growing season, so the bed is ready for planting in spring.
Weed Management:
While no dig gardening dramatically reduces the number of weeds, you will probably still get a few that pop up, especially along the edges of the bed.
Pull them by hand as needed, but overall, the number of weeds will be far less than in a traditional garden.
Soil Fertility:
Over time, as the layers break down, the soil underneath becomes richer and more fertile.
You may notice that each season, your plants grow more vigorously.
7. Expanding Your No Dig Garden
Once you’ve had success with one no dig bed, it’s easy to expand.
If you started small you could quickly added more raised beds using the same method.
You can use the no dig approach for an entire garden layout or just a few key beds, depending on your space and needs.
If you want to create more beds, simply repeat the layering process: cardboard (or newspaper), compost, and mulch.
You’ll be amazed at how quickly you can set up new growing spaces without the need for heavy digging or tilling.
For more inspiration, check out my guides:

Benefits of the No Dig Method
One of the things that attracted me to the no dig gardening method was the promise of better results with less effort.
Over the seasons, I’ve seen how this technique leads to healthier soil, fewer weeds, and more resilient plants.
Below are the key benefits I’ve experienced, and why they make the no dig method such a game changer for gardeners.
1. Improved Soil Structure
The biggest advantage of the no dig method is how it preserves and enhances the soil structure.
When you dig or till the soil, you disturb its natural layers, which can lead to compaction, poor drainage, and the loss of vital microorganisms.
By leaving the soil undisturbed and layering organic matter on top, you allow the soil to maintain its natural form.
Healthy, undisturbed soil is full of air pockets and channels created by earthworms and other organisms.
These air pockets allow water to penetrate deeper and roots to grow more easily.
Over time, I’ve found that plants in my no dig beds develop stronger root systems because the soil is less compacted, making it easier for them to access water and nutrients.
In contrast, traditional tilling can disrupt the balance of air, water, and organisms, leading to a less resilient soil structure.
No dig gardening fosters a balanced soil ecosystem that supports better plant growth without the need for heavy labor.
2. Fewer Weeds
One of the most immediate benefits I noticed was the significant reduction in weeds.
In a traditional garden, turning the soil brings dormant weed seeds to the surface where they can germinate.
With the no dig method, you leave those weed seeds buried and add layers of organic matter—such as compost and mulch—on top.
These layers act as a natural barrier, blocking light from reaching any weed seeds in the soil.
3. Less Physical Labor
One of the main reasons I switched to no dig gardening was the appeal of less physical labor.
In a traditional garden, the constant digging, turning, and weeding can be exhausting.
No dig gardening eliminates much of that effort.
When I start a new bed, all I need to do is lay down compost and mulch—no back-breaking digging required.
Because the soil remains undisturbed, there’s no need for annual tilling or digging over.
Once your garden is established, it requires very little ongoing effort.
All I do now is add a fresh layer of compost and mulch each year, and the garden practically maintains itself.
This makes no dig gardening perfect for anyone who wants a productive garden without the heavy lifting.
4. Better Soil Health and Fertility
A key benefit of the no dig method is how it builds soil fertility naturally, over time.
By continually adding organic matter, such as compost, you provide a slow, steady supply of nutrients to the soil, which supports plant growth without the need for chemical fertilizers.
The added compost also encourages the presence of beneficial soil organisms like bacteria, fungi, and earthworms, which play a crucial role in breaking down organic material into nutrients that plants can absorb.
These organisms help create a natural cycle of fertility that becomes more sustainable over time.
I’ve found that the longer I’ve used the no dig method, the richer and darker my soil has become.
Each year, the garden beds get more fertile, and I can see the results in the healthier, more vigorous growth of my plants.
5. Increased Soil Moisture Retention
The mulch and organic matter used in the no dig method not only suppress weeds but also help retain moisture in the soil.
The layers act as a protective covering, reducing evaporation and keeping the soil cool.
This is particularly beneficial during hot summers.
In my own garden, I’ve noticed that the beds stay moist for longer, which means I don’t have to water as often.
The mulch acts like a sponge, absorbing rainwater and slowly releasing it into the soil.
This keeps the garden consistently hydrated, which is crucial for plant health.
Even during dry spells, my plants seem to do better because the mulch layer helps prevent the soil from drying out completely.
6. Supports Soil Life
One of the most rewarding aspects of the no dig method is how it encourages a thriving soil ecosystem.
In a healthy garden, the soil is teeming with life—earthworms, fungi, bacteria, and other microorganisms.
These creatures play an essential role in breaking down organic matter and cycling nutrients through the soil.
By avoiding digging or tilling, you allow these organisms to flourish.
Earthworms, in particular, are incredibly beneficial to soil health.
They create tunnels that aerate the soil and help water reach plant roots.
Plus, their waste (known as worm castings) is rich in nutrients that plants love.
In my no dig beds, I’ve noticed a significant increase in earthworm activity, and I can see how this has improved the overall health of my garden.
By adding layers of compost and mulch, you provide these organisms with a steady food source.
Over time, they’ll break down the organic matter, enriching the soil and creating an environment where plants can thrive.
Essentially, the no dig method allows you to create a balanced ecosystem where nature does much of the hard work for you.
7. Sustainability and Long-Term Benefits
The no dig method promotes sustainable gardening practices by reducing the need for synthetic fertilizers, pesticides, and herbicides.
Since the method focuses on building soil health naturally, it helps create a self-sustaining ecosystem that requires fewer inputs over time.
By improving soil structure and fertility through organic matter, you’re also reducing the need for chemical interventions that can harm the environment.
8. Works for All Soil Types
The no dig method can be adapted to work on virtually any type of soil, including clay soil or sandy soils.
In my own experience, I started with compacted clay soil, and over time, the layers of compost and mulch have significantly improved its texture.
The compost helps to break up the heavy clay, improving drainage and making it easier for plants to grow.
For gardeners with poor-quality soil, the no dig method can be a transformative way to turn unproductive land into fertile garden beds.

Challenges You Might Face
Although the no dig method simplifies many aspects of gardening, it’s not without its challenges.
Here’s a look at the difficulties you might encounter and how to address them.
1. Slow Initial Results
When I first started my no dig garden, I expected immediate improvements, but it took a little longer than I anticipated to see significant results.
Since you’re not digging or turning the soil, the process of building fertility and improving soil structure happens gradually.
This can be frustrating if you're used to more immediate feedback from gardening efforts.
Why This Happens:
The organic matter you add—like compost and mulch—needs time to break down and integrate into the soil.
Depending on the health of your existing soil, the initial layers might take a season or more before you see a noticeable difference in plant growth and soil texture.
What to Do:
Patience is key.
While the no dig method builds soil health over time, it won’t transform poor soil overnight.
Each year will get progressively better as the compost layers broke down, enriching the soil, and improving plant yields.
To speed up the process, you can use well-aged compost or a richer blend of organic material to provide a quicker boost in nutrients for your plants.
2. Finding Enough Organic Material
One of the more practical challenges of no dig gardening is sourcing enough organic matter to build your layers, especially if you’re working with a larger garden.
For a successful no dig bed, you’ll need a generous amount of compost, mulch, and potentially cardboard or newspaper to get started.
If you’re not already composting at home, gathering enough material can be a logistical hurdle.
What to Do:
You can source compost from a local garden center, but that can get expensive quickly, especially for larger beds.
You could start by composting kitchen scraps, grass clippings, and yard waste to create your own supply of organic matter.
Check out my guide: How to Start Composting in a Tumbler.
You can also reach out to local farms, community gardens, or neighbors who might have extra compost, manure, or mulch to spare.
Some municipalities offer free compost or leaf mulch, so it’s worth checking with your local waste management service.
3. Weed Management in the Early Stages
While the no dig method is excellent at reducing weed growth, it doesn’t eliminate weeds entirely, especially in the early stages.
Why This Happens:
If the initial layer of cardboard or mulch is too thin or has gaps, weeds can find their way through, particularly tough ones like bindweed or couch grass.
Additionally, weeds can sometimes sprout in the top layer of compost, especially if it contains any weed seeds.
What to Do:
It’s crucial to apply a thick, overlapping layer of cardboard (or newspaper) to block weeds effectively.
Make sure to thoroughly cover the edges and corners of the bed where weeds are more likely to creep in.
As for weeds that pop up in the compost layer, you can pull them out by hand or cover them with additional mulch.
Over time, as the compost breaks down and the weed seeds are suppressed, the number of weeds you deal with will decrease.
4. Managing Heavy or Clay Soil
If you’re working with difficult soil, such as clay soil, the no dig method can take longer to show significant improvements.
If you are starting with compacted clay, it can take a few seasons of adding compost and mulch before the soil becomes more friable and plant-friendly.
While the no dig method will improve clay soil over time, the initial results can be slow.
Why This Happens:
Clay soil is dense and slow to drain, which can make it difficult for plant roots to establish.
The no dig method improves clay soil by adding organic material, but this happens gradually as the compost breaks down and integrates into the top layers of the soil.
What to Do:
To manage clay soil, its helpful to be extra generous with the organic matter in the early stages.
Adding thick layers of compost and mulch every season will gradually improve the soil’s texture.
You can also add additional organic amendments like gypsum or well-rotted manure to help break up the clay more quickly.
Be prepared for a slower start, but know that the results will come with patience.
5. Compost Quality and Availability
The success of the no dig method depends heavily on the quality of the compost you use.
Poor-quality compost may contain contaminants, insufficient nutrients, or even weed seeds, which can undermine your efforts to improve soil fertility and suppress weeds.
Why This Happens:
Compost quality can vary depending on where it comes from and how it’s produced.
If you’re purchasing compost, it might not always be fully decomposed or could contain weed seeds.
If you’re making your own compost, it can take time to get the right balance of materials and ensure it breaks down properly.
What to Do:
To avoid this, I recommend sourcing compost from reputable suppliers if you’re buying it.
Look for well-aged compost that’s dark, crumbly, and free of large chunks.
If you’re making your own, be sure to turn your compost pile regularly and maintain the right balance of “greens” (nitrogen-rich materials like grass clippings) and “browns” (carbon-rich materials like leaves).
This ensures your compost is nutrient-rich and free of weed seeds.
6. Pests and Wildlife
No dig gardens, like any other garden, can attract pests and wildlife, especially as the layers of mulch and compost break down and create a rich environment for insects and small animals.
While no dig gardening encourages beneficial organisms like earthworms, it can also attract pests such as slugs, snails, or even rodents who might take shelter under the mulch layer.
Why This Happens:
The rich layers of organic matter and mulch provide an ideal habitat for some pests, especially in damp conditions.
Slugs and snails, for instance, love the cool, moist environment under mulch and can feast on tender seedlings.
What to Do:
You can encourage natural predators, like birds or frogs, by creating a garden that attracts wildlife.
Additionally, avoid laying mulch too thickly near young plants, as this can create a moist environment that attracts slugs.
As for rodents, I haven’t had major issues, but if they become a problem, you can use wire mesh or garden covers to protect your plants.
For more tips, check out my guides:
Quick FAQs
1. What is no dig gardening?
No dig gardening is a method where you build soil fertility by layering organic matter like compost on top of the soil, rather than turning or digging it.
This helps maintain soil structure and encourages natural organisms to thrive.
2. How long does it take for a no dig garden to show results?
You’ll start to notice improvements in soil health and plant growth within the first year, but full benefits like reduced weeds and improved soil texture may take a few seasons.
3. Does the no dig method work on clay soil?
Yes, though clay soil may take longer to improve.
By consistently adding organic layers, you’ll gradually see better drainage and fertility.
4. What are the best plants for a no dig garden?
You can grow a wide variety of vegetables, herbs, and flowers using the no dig method.
Leafy greens, tomatoes, and root vegetables like carrots work especially well.
5. What are the disadvantages of no dig gardening?
Some challenges include sourcing enough compost or organic materials, and the method may take time to show significant improvements if you have very poor or compacted soil.
Wrap-Up
The no dig gardening method has completely transformed the way I approach growing vegetables and maintaining my garden.
By simply layering surface mulch and compost on top of the soil, I've created fertile, low-maintenance new beds that continue to improve year after year.
This method not only makes gardening easier, but it also helps build healthier soil and stronger plants.
Whether you're a beginner or an experienced gardener, I highly recommend giving no dig gardening a try—it’s a sustainable, efficient way to grow a thriving garden.
Like this article?
Save it on Pinterest so you can find it again.