Growing Lavender from Seed: The Easiest Ways
This website is reader-supported - thank you! This post may contain affiliate links. As an Amazon Associate, I earn from qualifying purchases at no extra cost to you.
If you're here, it's likely because the idea of growing lavender from seed has captured your imagination.
And why wouldn't it?
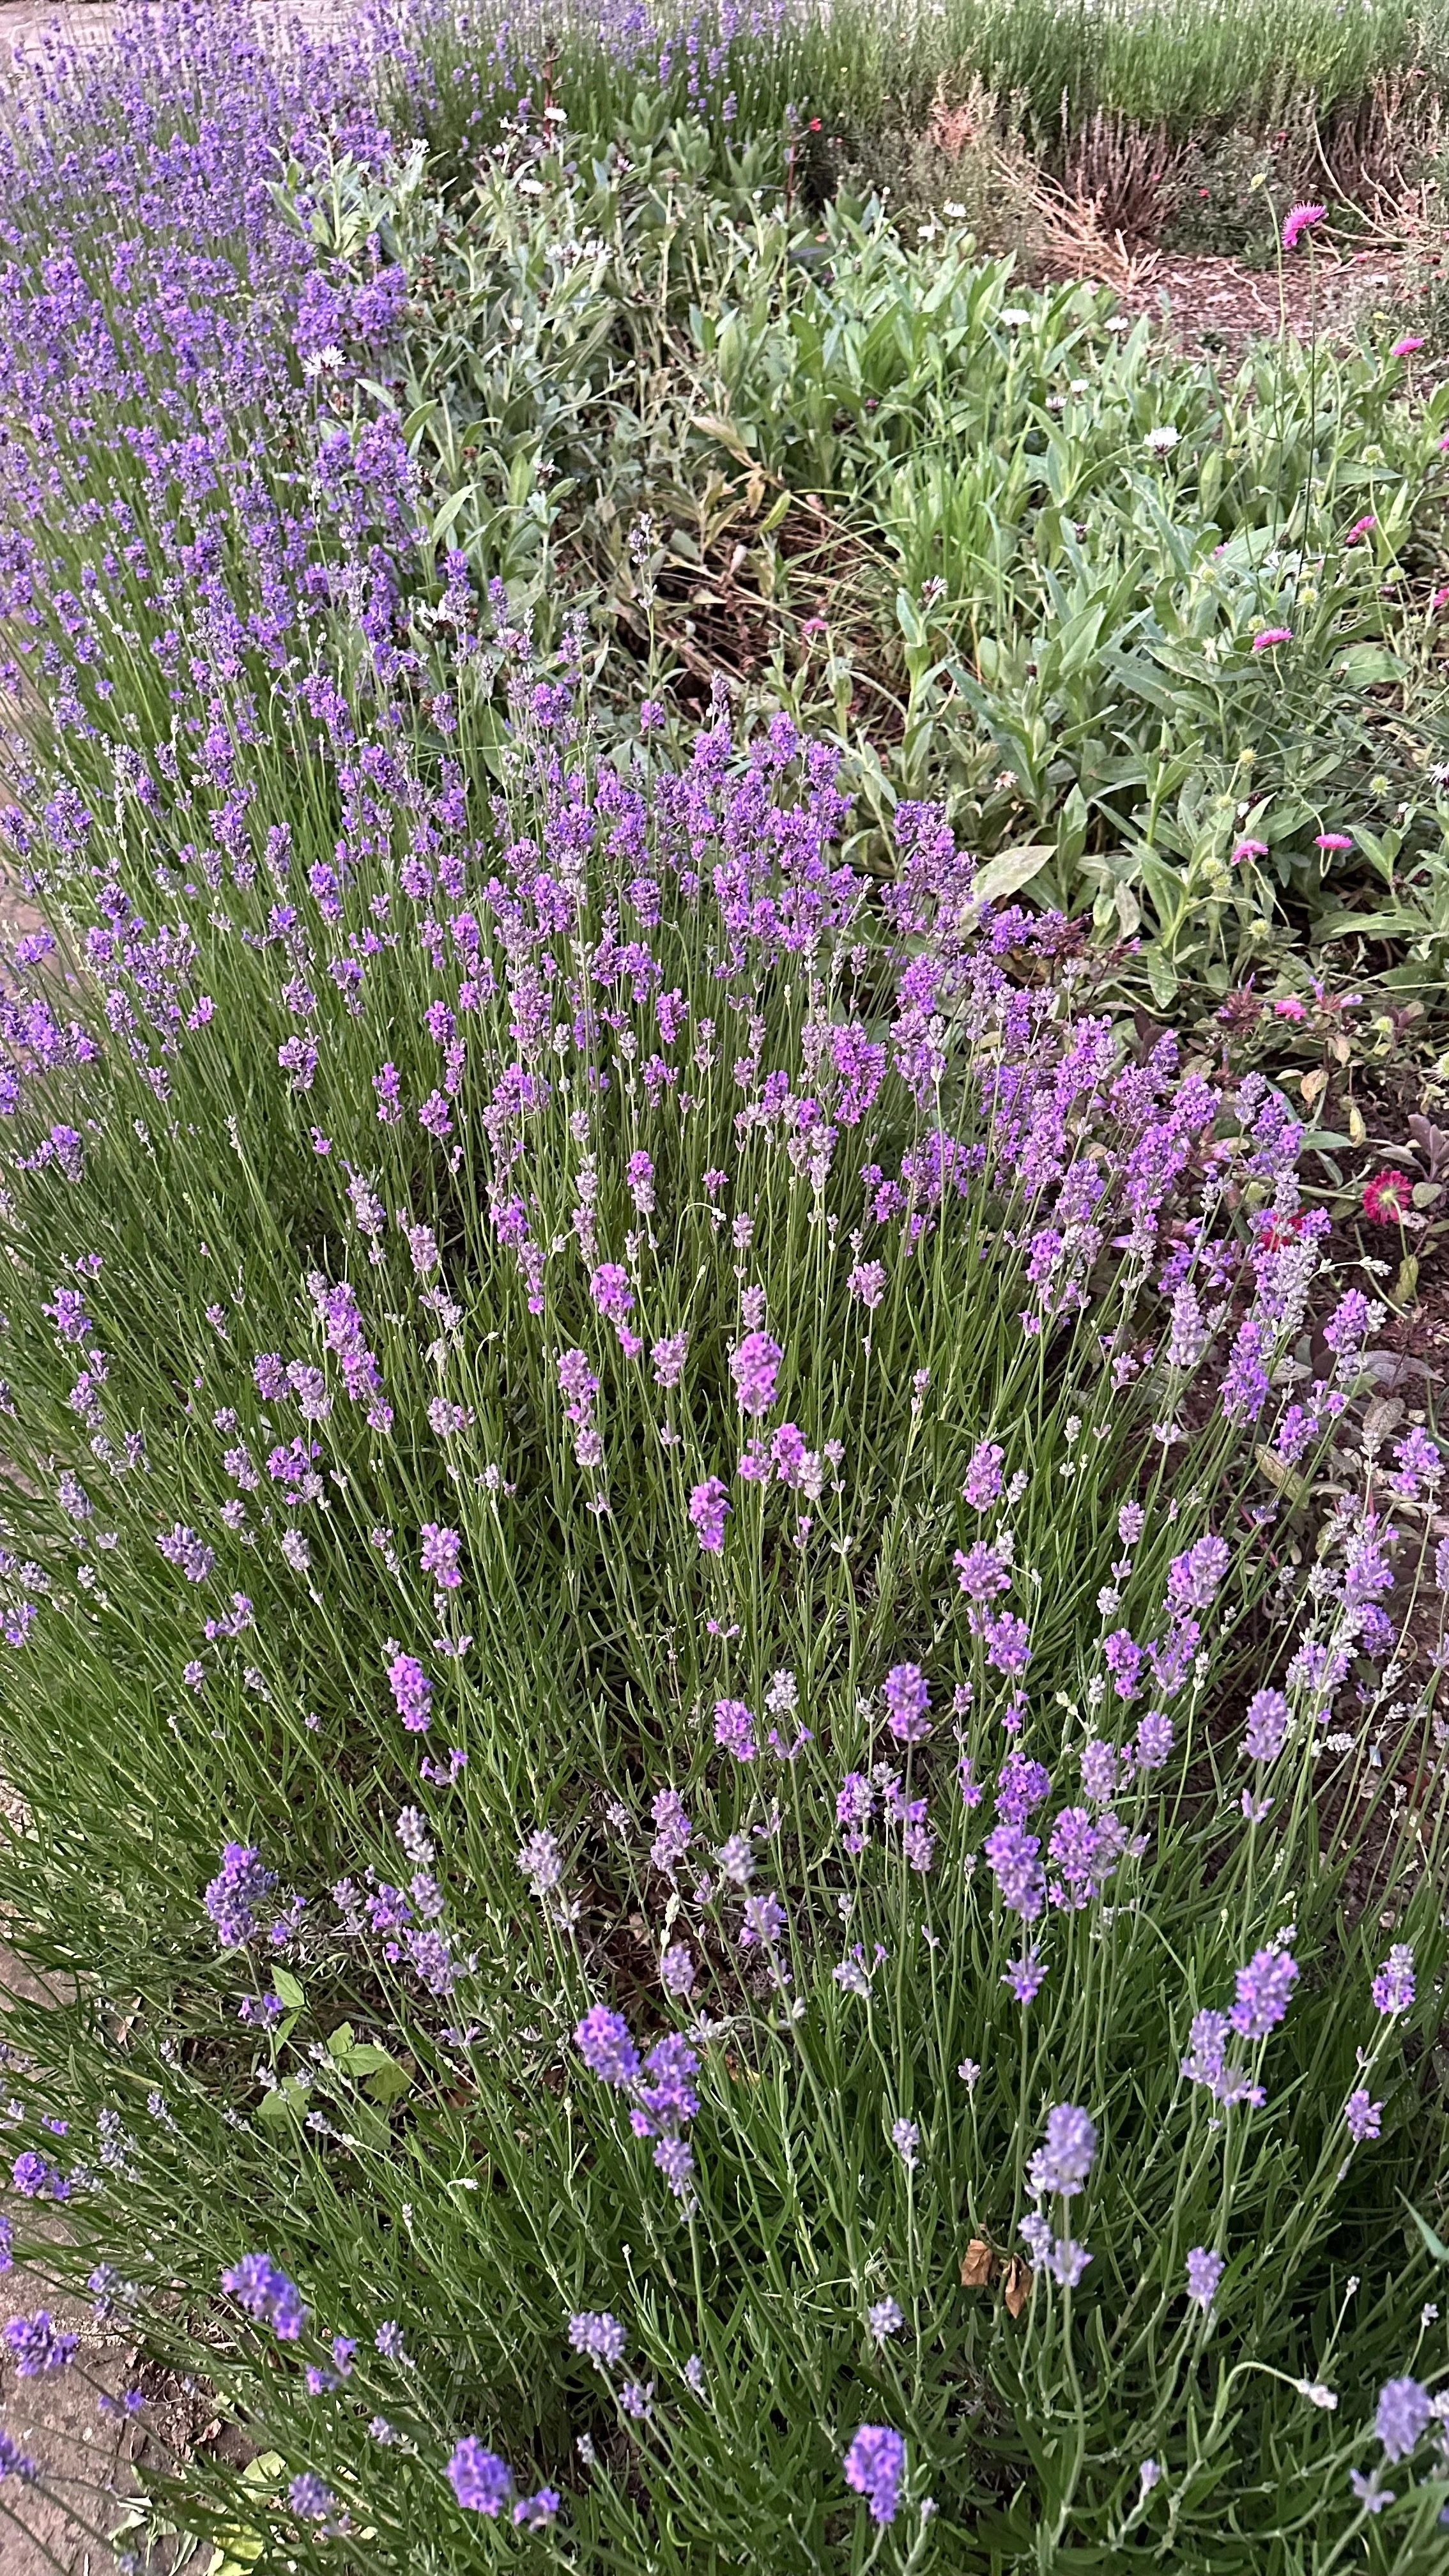
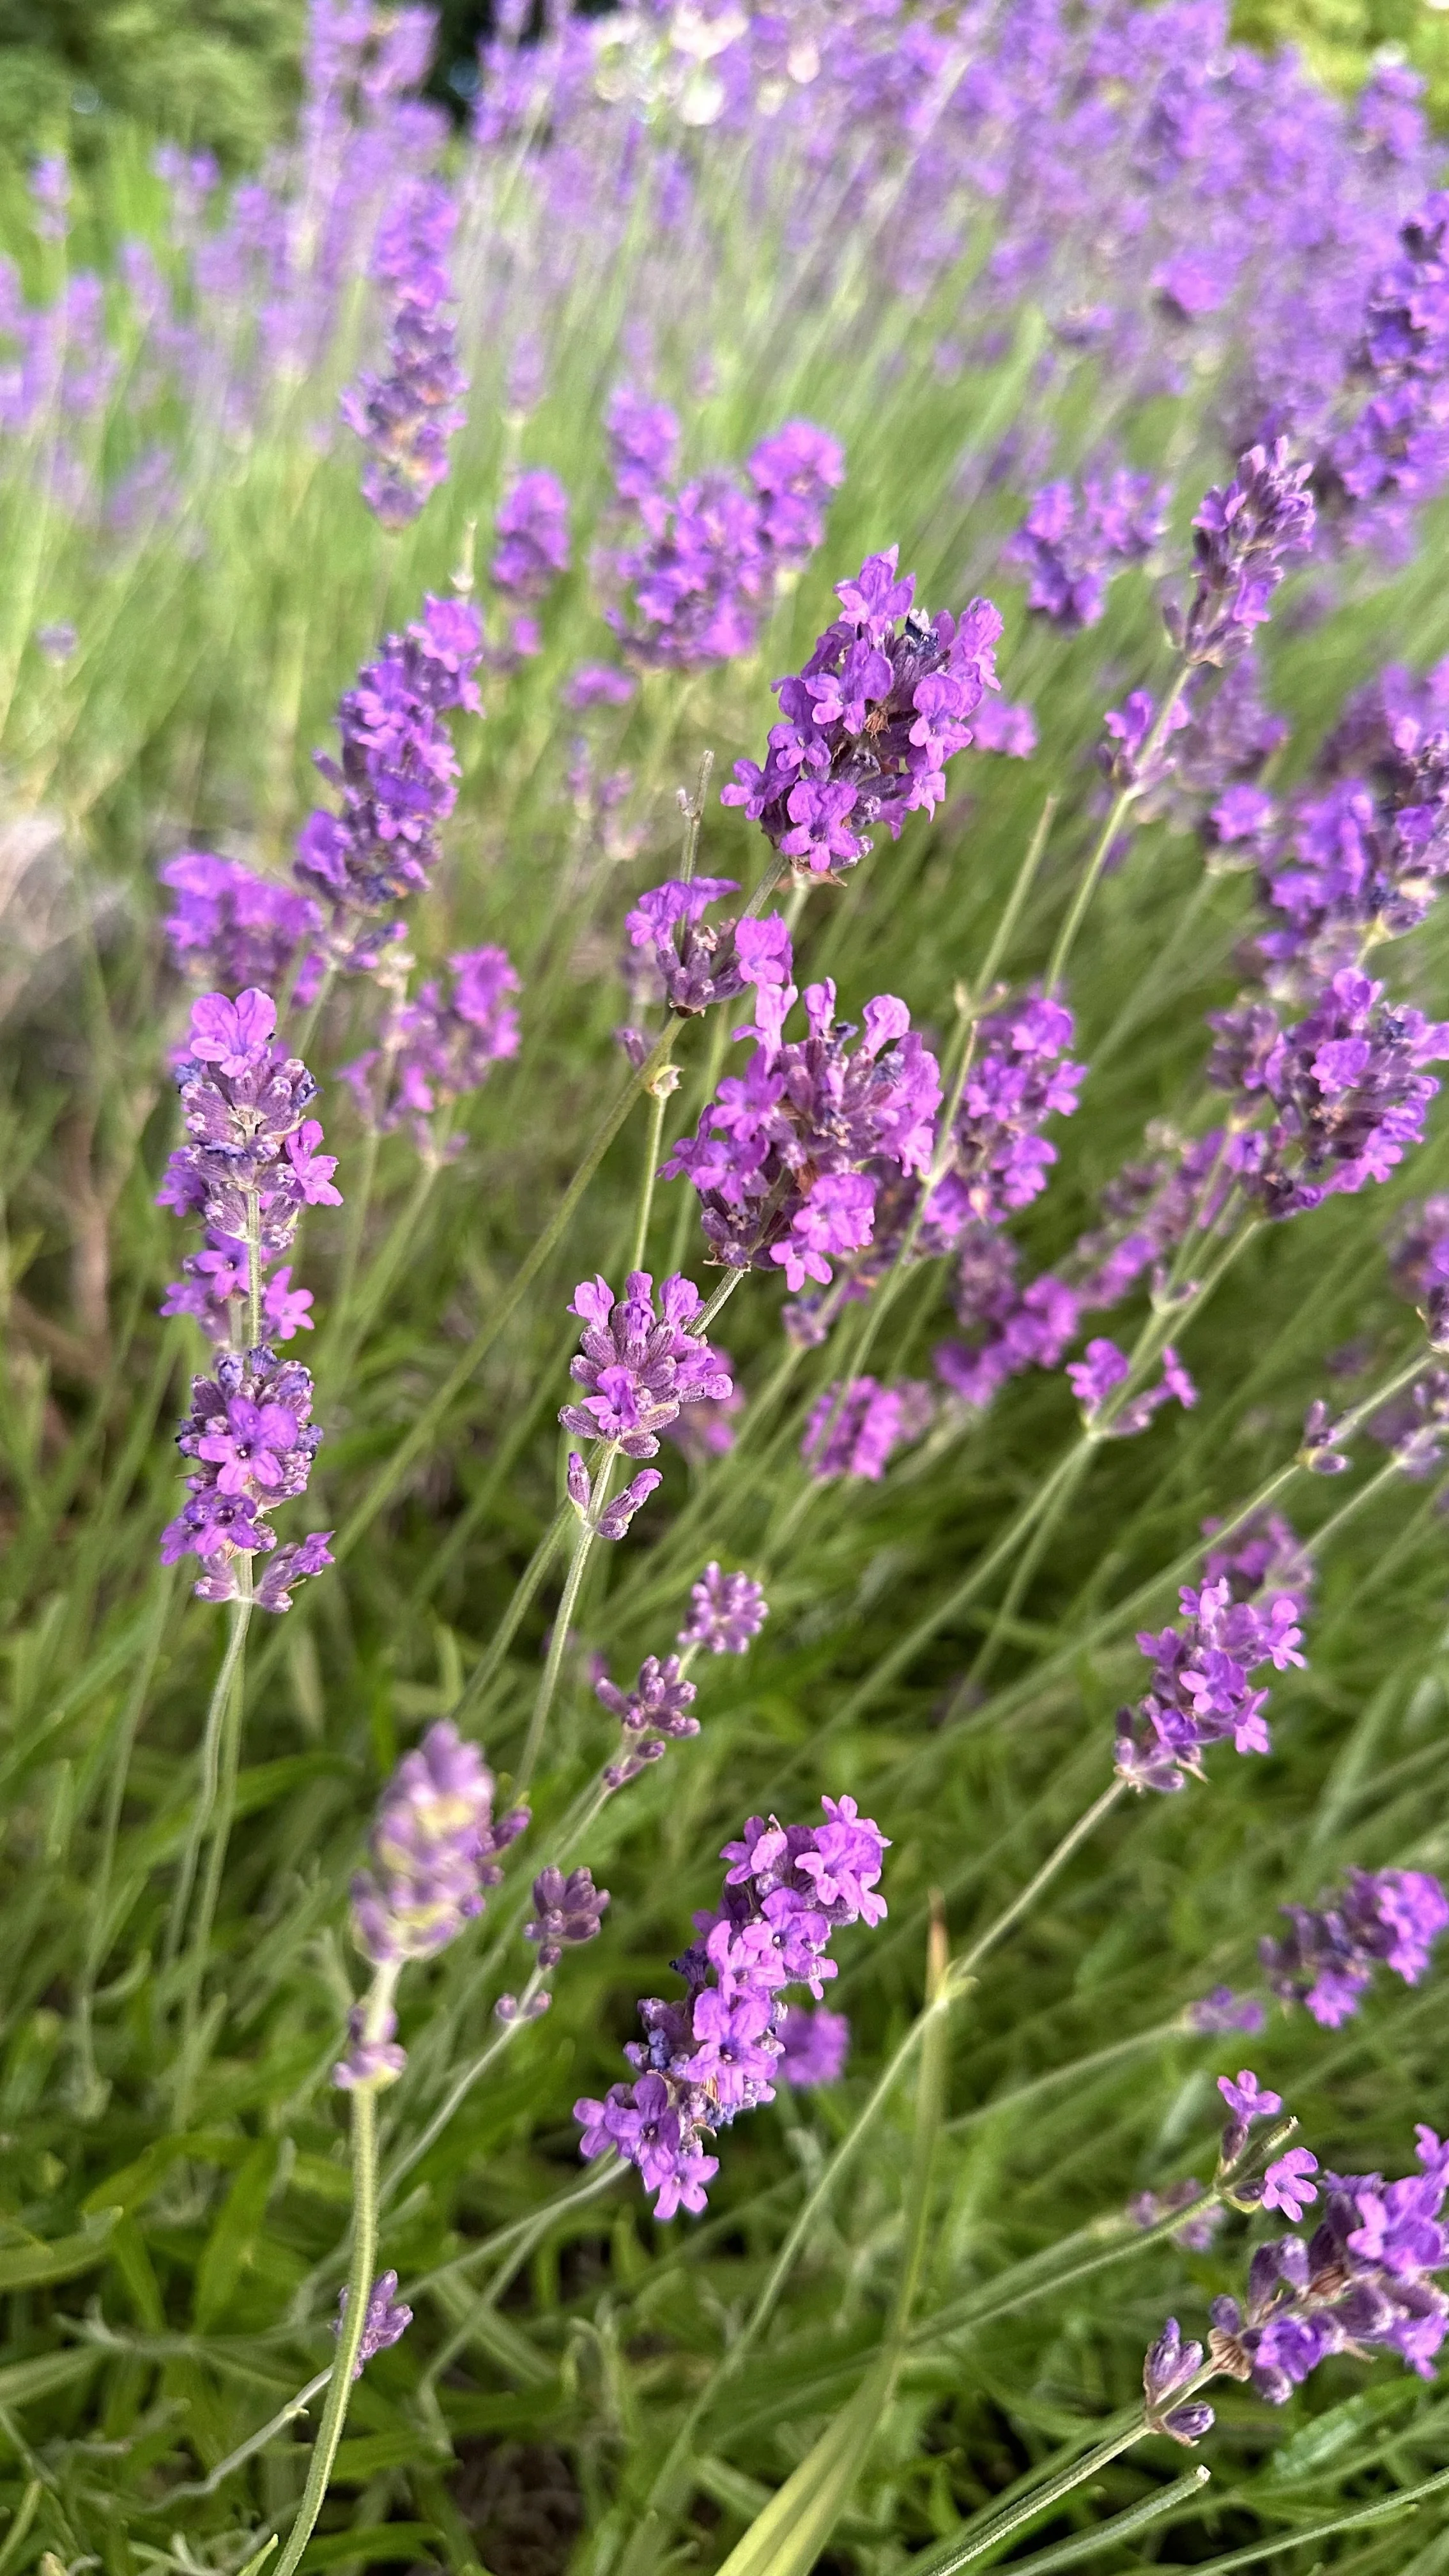
Lavender, with its calming fragrance, has a way of transforming gardens.
Growing lavender from seed can be a test of patience, but it's also a very rewarding experience.
This guide is designed to walk you through each step, from seed selection and planting to care, harvesting, and beyond.
With a little patience, you'll see that even the smallest seeds can lead to wonderfully fragrant results.
To learn more about growing lavender, check out my guides:
Getting Started: Seed Selection and Preparation
Starting a lavender-growing adventure begins with selecting the right seeds.
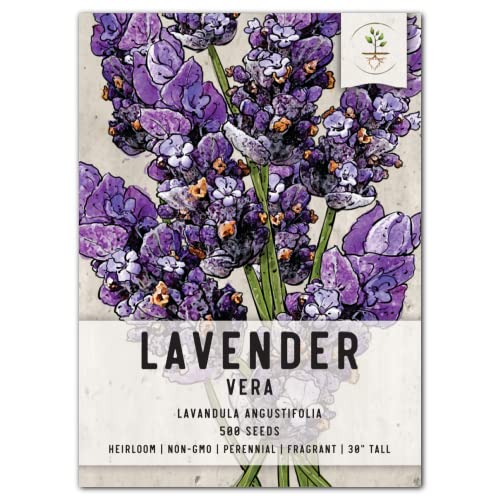
Choosing the Right Lavender Seeds
When you're browsing through options to plant lavender seeds, you'll notice there are several types of lavender.
Each type has its own unique characteristics, flowering times, and growth requirements.
English lavender is widely regarded for its sweet fragrance and is often recommended for beginners due to its hardiness.
Here are the English lavender seeds I recommend growing:
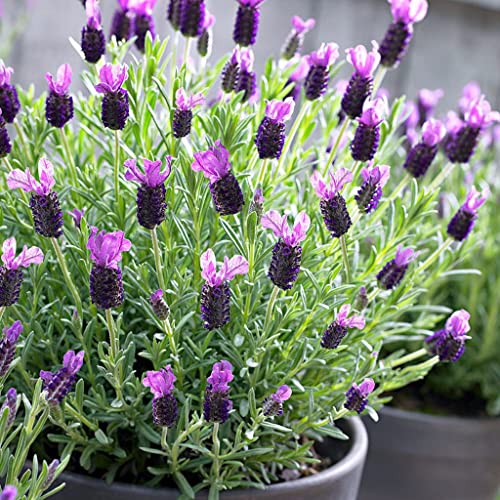
However, don't be afraid to explore other varieties.
Whether you're leaning towards French lavender, known for its distinctive butterfly-like petals or the less common but equally enchanting Spanish lavender, each brings its own charm to your garden.
Here is the French lavender I recommend growing:
Preparing Your Lavender Seeds: The Cold Stratification Process
Many lavender varieties require cold stratification to germinate effectively.
This might sound technical, but it's a simple process you can do at home.
Here’s how:
Moistening:
Begin by moistening a paper towel or a small amount of sand.
The goal is to provide a damp environment for your seeds, not soaking wet.
Packing:
Place your lavender seeds in the moistened medium.
If using a paper towel, you can then place this inside a plastic bag. For sand, a small container with a lid will work.
Chilling:
Now, it's time for the cold treatment. Put your seeds into the refrigerator.
This mimics the natural cold period that seeds would experience over winter outdoors.
The duration for cold stratification varies but typically ranges from one to three months for lavender seeds.
Patience:
This is perhaps the hardest part! But remember, this process is waking your seeds up, telling them it's almost time to grow.
Check out my guide:
After Stratification: Sowing Your Prepared Seeds
Once the stratification period is over, your seeds are ready to be planted.
But remember, lavender seeds need light to germinate, so instead of burying them under soil, simply press them gently onto the surface of your seed starting mix.
Here is the seed starting mix I recommend:

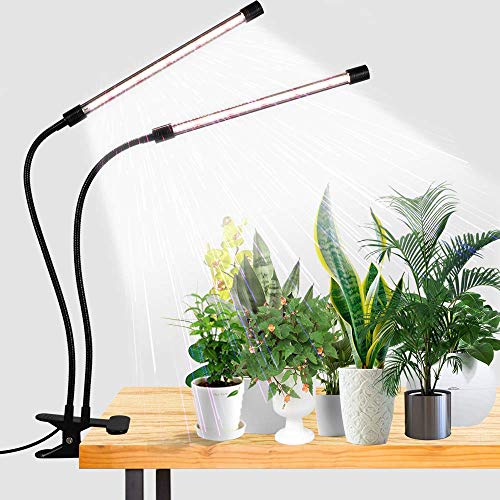
Keep the soil lightly moist and in a warm, bright spot – a sunny window ledge or under grow lights are ideal locations.
Here are the grow lights I recommend using:
Germination Expectations
Germinating lavender seeds can test your patience.
It often takes 2-4 weeks for lavender seeds to sprout, and sometimes longer.
Keeping the soil evenly moist and ensuring they have plenty of light will help encourage germination.
Using a germinating lavender seeds paper towel method for initial germination can also be effective.
Simply place your seeds between damp paper towels, in a plastic bag, and keep them in a warm place until you see tiny roots emerging.
Then, transfer them gently to your potting mix.
To learn more about growing from seed, check out my guides:
For more growing tips, check out my guides:
Planting Time: Sowing Seeds Indoors
Moving on from the preparation stage, it's now time to sow your lavender seeds.
Starting seeds indoors is a fantastic way to get a jump on the growing season, especially in regions with shorter warm periods.
Here's how to do it right:
Seed Starting Mix and Containers
First, choose a high-quality seed starting mix.
Here is the one I recommend:
Lavender prefers well-draining soil, so ensure your mix is light and not too dense.
You can use small pots, seed trays, or even recycled containers – just make sure they have good drainage holes.
Here are the seed trays I recommend using:

Sowing Your Lavender Seeds
Remember, lavender seeds need light to germinate effectively.
Here's the step-by-step process:
Fill Your Containers:
Gently fill your chosen containers with the seed starting mix, leaving a little space at the top.
Sow the Seeds:
Sprinkle your lavender seeds over the surface of the soil.
There's no need to cover them with more soil; they just need a gentle press into the surface to ensure they're in contact with the moist mix.
Moisture is Key:
Using a spray bottle, lightly mist your seeds with water.
Keep the soil moist (not soaking wet) to encourage germination.
Covering the containers with a clear plastic dome or wrap can help retain moisture and warmth.
Light and Warmth:
Place your containers in a spot that receives plenty of light.
A south-facing window can work, but if you're in a less sunny locale or want to ensure optimal growth, consider using grow lights.
Lavender seeds germinate best at temperatures between 65-70°F (18-21°C).
Here are the grow lights I recommend:
Patience and Observation
After planting, the waiting game begins. Check on your seeds daily, ensuring the soil remains moist and adjusting the light as needed to prevent overheating.
Thinning Seedlings
Once your lavender seedlings emerge and grow their first set of true leaves, it's time to thin them.
This simply means reducing the number of seedlings to prevent overcrowding.
Choose the strongest seedlings to keep, gently removing the others.
You can transplant these extras into other pots if you can't bear to part with them!
Transplanting to Larger Pots
As your lavender plants grow, they may outgrow their initial containers.
When they have several sets of leaves and seem to be crowding each other, gently transplant them into larger pots with a similar well-draining potting mix.
This gives the roots more room to expand and strengthens the plant before moving outdoors.
To learn more about herb gardening, check out my guides:

Lavender's Growth Journey: Patience is Key
Lavender, with its delicate flowers and enchanting fragrance, requires time and patience to mature from tiny seeds into robust, blooming plants.
Here's what to expect and how to nurture your lavender throughout its growth phases.
Germination: The First Step
After planting your lavender seeds with care, the first test of patience comes with germination.
Lavender seeds are notorious for their slow and sometimes erratic germination rates.
It can take anywhere from 2 to 6 weeks for lavender seeds to sprout, and sometimes even longer.
This variance is normal, so don't be disheartened if you don't see immediate results.
Seedling Stage: Tender Beginnings
Once your lavender seeds have sprouted, you'll enter the seedling stage.
This period is critical, as your young plants are very delicate and require consistent care.
Here, they need a good balance of sunlight, moisture, and temperature control.
Sunlight:
Ensure your lavender seedlings receive plenty of light.
This may mean supplementing natural light with grow lights to achieve 6-8 hours of sunlight daily.
Watering:
Lavender seedlings prefer to stay moist but not waterlogged.
Overwatering is a common mistake that can lead to root rot.
Allow the soil to dry slightly between watering.
Temperature:
Keep the environment around your seedlings at a stable temperature, ideally between 65-75°F (18-24°C) during the day.
Vegetative Stage: Growing Strong
As your lavender plants move beyond the seedling phase, they enter a vegetative state where they focus on growing strong roots and leaves.
This stage is less about waiting for flowers and more about building a healthy, robust plant that will support blooms in the future.
Potting Up:
If your plants become root-bound or seem to outgrow their initial pots, it's time to pot up to larger containers.
This gives the roots room to grow and strengthens the plant's overall structure.
Feeding:
Lavender generally does not require a lot of fertilizer, but a light application of a balanced, slow-release fertilizer in the early stages of growth can support healthy development.
Here is the one I recommend:

Pre-Bloom: The Anticipation Builds
As the growing season progresses, your patience will be rewarded as you begin to see signs of impending blooms.
Lavender plants may take a year or more from seed to produce their first flowers, especially if grown without the acceleration of greenhouse conditions.
Blooming: The Reward
Finally, the moment you've been waiting for: your lavender plants start to bloom.
The sight and scent of lavender in bloom are worth every moment spent waiting, watering, and wondering.
Harvest the flowers as they open to encourage more blooms, but also leave some on the plant to enjoy in the garden.
Yearly Growth: A Perennial Friend
Remember, lavender is a perennial herb, meaning it will return year after year in the right climates.
With each passing year, your plants will become more robust and prolific, producing more of those cherished flowers.
Prune your lavender plants annually in early spring or late fall to encourage new growth and maintain a manageable shape.
To learn more about starting an herb garden, check out my guide: How to Start a Raised Bed Herb Garden

Caring for Your Lavender
Caring for lavender isn't overly complex, but understanding its basic needs will significantly impact its health, growth, and blooming.
Here’s what you need to keep in mind:
Sunlight: Basking in the Glow
Lavender thrives in full sun.
This plant originates from the Mediterranean region, which clues us into its preference for bright, sunny locations.
To ensure your lavender flourishes, plant it in a spot where it can receive at least 6 to 8 hours of direct sunlight daily.
A south-facing garden location is great.
If you're growing lavender in pots, moving the pots to catch the sun's path is a smart strategy to maximize light exposure.
Watering: Less is Often More
One of the keys to lavender's heart is not to overwater it.
This herb prefers to stay on the drier side, mirroring its natural, drought-prone habitats.
Overwatering or poor drainage can lead to root rot, a common problem for lavender.
Water your lavender plants deeply but infrequently, allowing the soil to dry out somewhat between waterings.
This approach encourages deeper root growth, making the plant more resilient to drought.
For more watering tips, check out my guide: Water Butts: Sustainable Water Storage for Your Garden.
Soil: The Foundation of Health
Lavender prefers well-draining soil with a neutral to slightly alkaline pH.
Heavy, clay-rich soils can be problematic, so if that's what you have, consider amending it with sand or gravel to improve drainage or opting for raised beds or containers.
To see what type of soil you have, here is the soil pH tester I recommend:

When planting in pots, a good-quality potting mix designed for succulents or cacti is a great choice, as it provides the drainage lavender loves.
Pruning: Encouraging Growth
Pruning is crucial for maintaining a compact, healthy lavender plant.
It encourages growth, prevents the center from becoming woody, and promotes the production of flowers.
Prune lavender in early spring or after it blooms, cutting back about a third of the plant.
This might seem like a lot, but lavender responds well to pruning, coming back fuller and more vigorous.
Fertilizing: Lightly Does It
Lavender generally does not require a lot of fertilizer, especially if planted in the ground.
If you're growing lavender in containers or notice your plants seem a bit lackluster, a light application of a balanced, slow-release fertilizer in the early spring can help.
Be cautious not to over-fertilize, as too much nitrogen can encourage leaf growth over flowers and make the plants less robust.
Here is the fertilizer I recommend:
Winter Care: Protecting Your Plants
In regions with cold winters, lavender needs some protection to survive the frost.
Mulching with gravel or sand can help by reflecting light and heat up onto the plant and ensuring excellent drainage around the roots.
For potted lavender, consider moving the pots to a sheltered location or even indoors if you have a cool, sunny spot.
Dealing with Pests and Diseases
Lavender is relatively pest and disease-resistant, thanks in part to its fragrant oils.
However, poor growing conditions can make it vulnerable to issues like root rot, fungal diseases, and pests like aphids.
Good cultural practices, such as proper spacing, adequate sunlight, and well-draining soil, are your first line of defense.

Harvesting Your Lavender
When to Harvest
Timing is crucial when it comes to harvesting lavender.
The best time to harvest is when the buds have formed and are just beginning to open.
This is when the essential oils, responsible for lavender’s signature scent, are most concentrated in the buds.
Depending on your climate and the variety of lavender, this typically occurs in late spring to early summer.
If you're harvesting lavender for its essential oils, the morning after the dew has dried but before the sun becomes too intense is the ideal time.
This helps ensure that the oils are at their peak.
How to Harvest
Harvesting lavender is relatively straightforward, but doing it correctly can influence the quality of the flowers and the health of your plant.
Here's how to do it:
Selecting Stems:
Look for stems that have flowers that are just starting to open.
You'll want to cut stems that have a good length of unflowered stem below the flower head, as this can be useful for bunching and crafting.
Cutting:
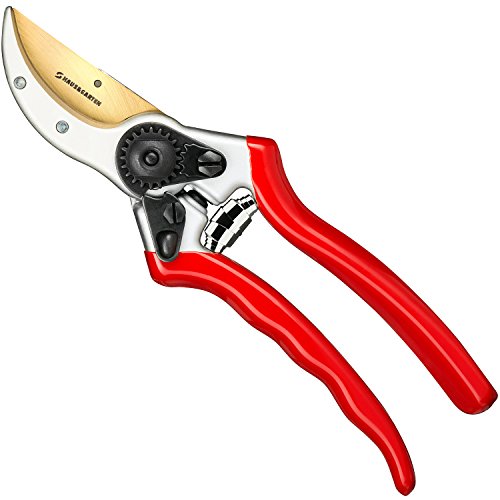
Using a sharp, clean pair of garden shears or scissors, cut the stem of the lavender about 2 inches above the woody part of the plant.
Cutting too close to the woody base can harm the plant, while leaving enough stem encourages healthy regrowth.
Gathering Bundles:
Collect the cut stems in bundles.
Not only does this make them easier to manage, but it also prepares them for drying if that's your intent.
These garden shears are perfect for the job:
Drying Lavender
Drying lavender is a fantastic way to preserve its fragrance and beauty.
Here’s a simple method to dry lavender:
Bundle the Stems:
Gather small bundles of lavender stems and secure them at the base with a rubber band or twine.
Keeping the bundles small ensures good air circulation, which is critical for even drying.
Hang to Dry:
Hang the bundles upside down in a warm, dry, and dark place.
Basements, attics, or even a closet can work well.
The darkness helps maintain the vibrant color of the lavender flowers, while the warm, dry conditions ensure a quick drying process.
Wait:
Patience is key.
Drying can take anywhere from two weeks to a month, depending on the conditions.
You'll know the lavender is fully dried when the stems snap cleanly rather than bending.
Using Harvested Lavender
Once your lavender is harvested and dried, the possibilities for its use are nearly endless:
Culinary Uses:
Lavender adds a unique flavor to baked goods, teas, and even savory dishes.
Ensure you use culinary-grade lavender if you're diving into lavender-infused cooking or baking.
Aromatherapy and Crafts:
The dried flowers are perfect for making potpourri, lavender sachets, or even homemade soap.
Lavender’s calming scent makes it a favorite for aromatherapy products.
Decorative:
Dried lavender bouquets and wreaths can add a touch of elegance and fragrance to any room.
Tips for a Successful Harvest
Regular Harvesting:
Regularly cutting lavender not only provides you with a steady supply of flowers but also encourages the plant to produce more blooms.
Leave Some Flowers:
If you can, leave some flowers on the plants. They're not only beautiful and fragrant but also attract pollinators to your garden.
To learn more, check out my guide: How to Store Dried Herbs: Tips to Ensure they Last Longer

Quick FAQs
What is the Fastest Way to Germinate Lavender Seeds?
The fastest way to germinate lavender seeds is through the paper towel method.
This method allows you to provide constant moisture and warmth, which can speed up the germination process.
Here's how to do it:
Moisten a Paper Towel:
Wet a paper towel so it's damp but not dripping wet. Lay it flat.
Place Seeds on the Towel:
Scatter your lavender seeds across one half of the paper towel. Fold the other half over the seeds to cover them.
Seal in a Plastic Bag:
Place the folded towel inside a plastic zip-lock bag. This creates a mini greenhouse effect.
Warm Location:
Put the bag in a warm spot, like the top of a refrigerator or a warm shelf. The ideal temperature is around 70°F (21°C).
Check Regularly:
Open the bag every few days to check for mold (if any appears, the paper towel is too wet) and to see if seeds have sprouted.
Add a few drops of water if the towel begins to dry out.
Using this method, you can see germination in as little as two weeks, although some seeds may take longer.
How Much Sun Does Lavender Need?
Lavender thrives in full sun, requiring at least 6 to 8 hours of direct sunlight daily.
The intense light contributes to the development of essential oils, which are responsible for the plant's fragrance and flavor.
In less sunny areas, consider using a grow light if you're growing lavender indoors to supplement natural light.
Can I Grow Lavender in Pots?
Yes, you can absolutely grow lavender in pots, and it's a great option if you have limited space or unsuitable soil conditions in your garden.
Here are a few tips:
Choose the Right Pot:
Ensure your pot has good drainage holes. Lavender does not like "wet feet" and can suffer from root rot in poorly draining containers.
Use Well-Draining Soil:
A mix designed for cacti and succulents is ideal because it ensures the roots aren't sitting in moisture. Here is the soil mix I recommend.
Consider Pot Size:
Lavender can grow quite large, so choose a pot that gives the plant room to grow but isn't so big that the soil stays wet for long periods.
How Long Does Lavender Take to Grow?
From seed, lavender plants can take up to a year (or sometimes more) to mature and start blooming, especially if not grown under optimal conditions like a greenhouse.
The germination phase alone can last 2-6 weeks, and it might take a few months before seedlings are strong enough to transplant.
Once established, lavender grows more quickly but requires patience in the early stages.
Can Lavender Be Grown Indoors?
Growing lavender indoors is possible, but it requires careful attention to mimic its natural growing conditions as much as possible.
This includes:
Providing Enough Light:
A south-facing window or artificial grow lights can offer the 6-8 hours of sunlight lavender needs. Here are the grow lights I recommend.
Ensuring Good Air Circulation:
Ventilation helps mimic the breezy conditions lavender enjoys outdoors.
Maintaining the Right Temperature:
Cooler indoor temperatures, especially at night, can help mimic the lavender's preferred climate.
How to Grow Lavender from Cuttings?
Growing lavender from cuttings can be a faster way to get a blooming plant than starting from seed.
To learn how to do this, check out my guide: How to Take Lavender Cuttings: A Step-by-step Guide.
How Fast Does Lavender Grow in Pots?
Once established, lavender in pots can grow quite rapidly, especially if its needs for sunlight and well-draining soil are met.
However, the initial growth from seed or cuttings can be slow, requiring patience as the plant establishes itself.
Regular pruning can help encourage bushier growth and more vigorous development.
Pin this post to save it for later!